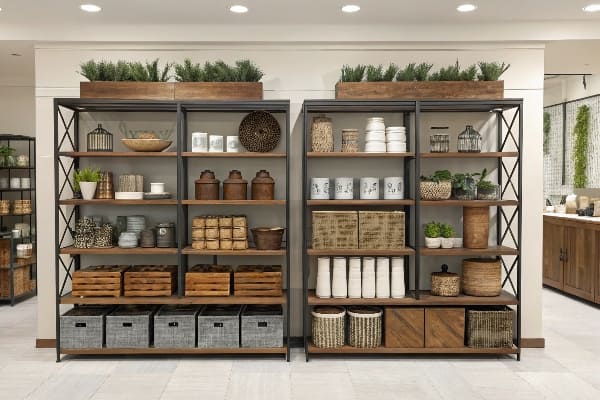
A chaotic wall display creates visual noise that drives customers away in seconds. You are losing sales not because your product is bad, but because your vertical merchandising strategy confuses the shopper's eye.
To stage wall mounted retail shelving effectively, merchandisers should prioritize visual hierarchy and accessibility:
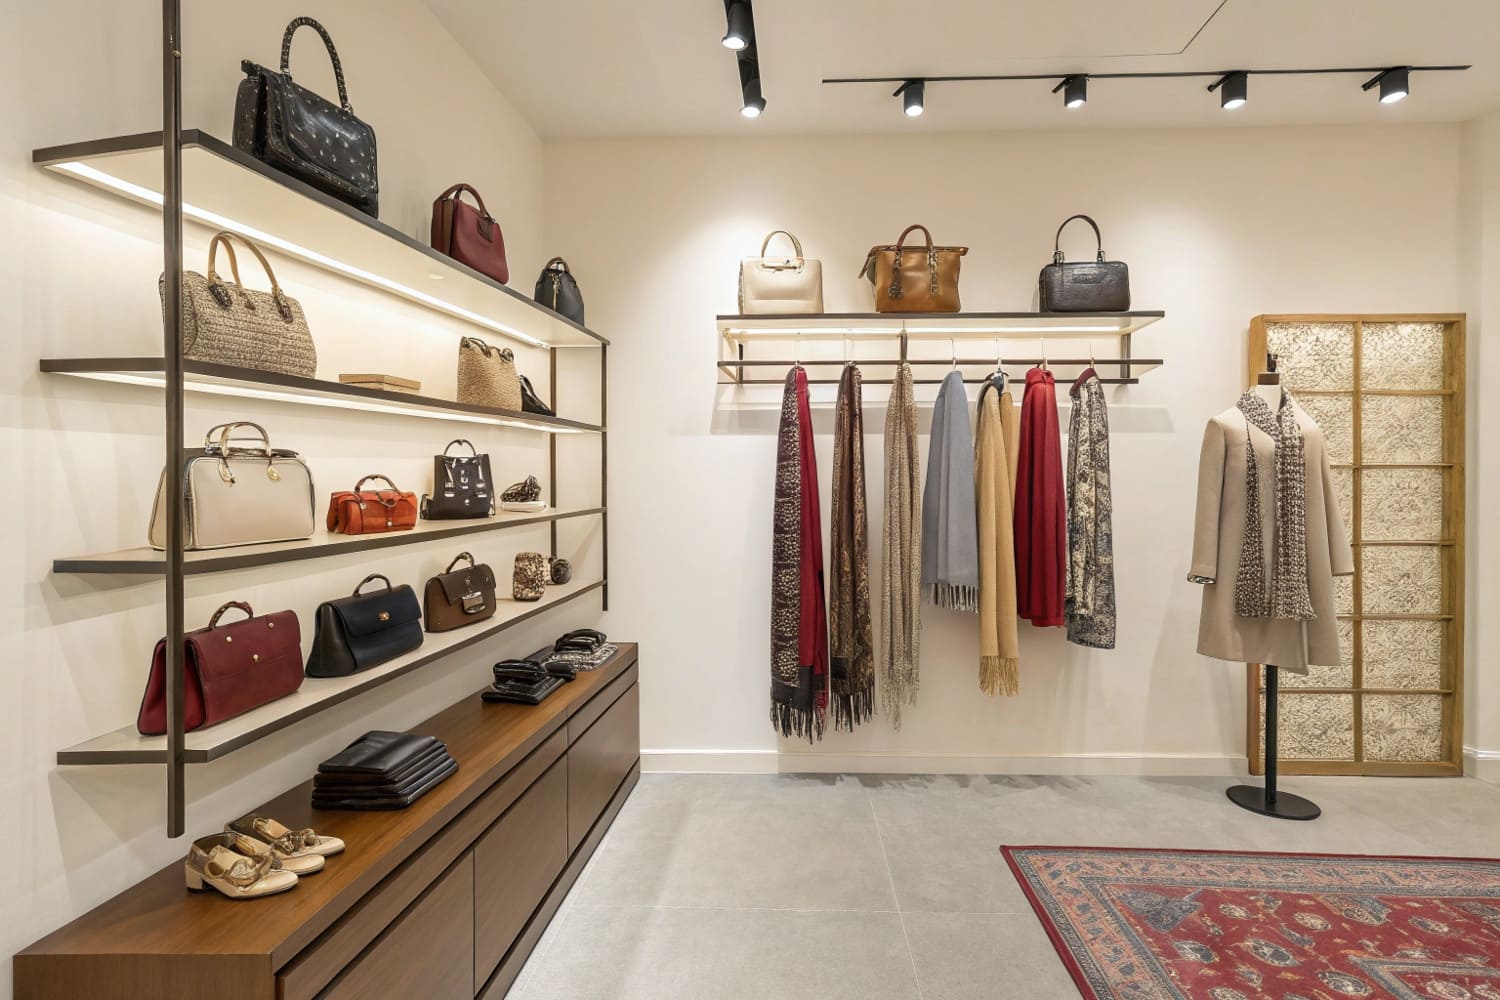
Establish Zones: Place high-margin items at eye level, approximately 50 to 54 inches (127–137 cm) from the floor.
Utilize Angled Shelves: Tilt lower shelves upwards by 15 degrees to improve label readability.
Optimize Lighting: Use white inner liners to reflect ambient light into dark shelf corners.
How do you stage a shelving unit?
Most brands guess where to put their products, leading to dead stock on the bottom shelves. A scientific approach to vertical placement changes everything.
To stage a shelving unit for maximum sell-through, retailers must align product placement with shopper ergonomics:
Eye-Level Focus: Position "Hero Products" in the primary visual zone, 48 to 60 inches (122–152 cm) high.
Stoop Zone Utility: Reserve the bottom 18 inches (45 cm) strictly for bulk items or large refill packs.
Visual Breaks: Introduce negative space or POP (Point of Purchase) talkers to prevent clutter fatigue.
The Ergonomics of the "Strike Zone1"
You can have the best packaging in the world, but if you place it outside the shopper's biomechanical comfort zone, it becomes invisible. I've seen this happen too often. A client from Chicago sent me a planogram where their high-margin cosmetic jar was placed on a shelf just 24 inches (61 cm) off the ground. They couldn't understand why sales were flat.
The reality is simple: The average female shopper in North America is about 5'4" (163 cm). She is not going to crouch down in a busy aisle to read a small label. This is why I enforce the "Human Height Heat Map2" rule in my designs. The "Strike Zone"—or the "Eye-Level Buy Level"—sits strictly between 50 and 54 inches (127–137 cm) from the floor. This is where your highest margin SKU must live.
But what about the bottom shelves? You can't just leave them empty. This is the "Stoop Zone3." It requires physical effort to access. So, we only place large, recognizable bulk items there—things people intentionally hunt for, like a 10lb (4.5 kg) bag of dog food or a gallon (3.8 L) of detergent. If you put a small, high-impulse item down there, it dies. Also, for the lower shelves that are still within reach, about 30 inches (76 cm) up, we use the "Chin-Up" design. We angle the shelf upwards by 15 degrees. This forces the product face to "look up" at the shopper, increasing label readability by 100% for someone standing 3 feet (0.9 m) away. It's a structural tweak that costs pennies but saves the sale.
| Shelf Zone | Height Range (Imperial) | Height Range (Metric) | Product Strategy |
|---|---|---|---|
| Stretch Zone | > 72 inches | > 183 cm | Lightweight, low-turnover items. Hard to reach. |
| Strike Zone | 48 – 60 inches | 122 – 152 cm | High Margin / Impulse. The "Hero" product area. |
| Touch Zone | 30 – 48 inches | 76 – 122 cm | Best sellers, kid-friendly items, staples. |
| Stoop Zone | < 18 inches | < 46 cm | Bulk items, heavy refills. Destination purchases only. |
I learned the "Chin-Up" rule the hard way when a client's jerky display failed because the bottom rows were invisible to standing adults. Now, I always angle the bottom two trays upward structurally, so the product catches your eye without you having to bend a knee.
What is retail shelving display?
Retail shelving is often boring, static metal. A true display disrupts the monotony and grabs attention.
Retail shelving display is a strategic merchandising tool that isolates products from the cluttered aisle environment to drive sales. These fixtures, often made of corrugated board or temporary materials, attach to existing store infrastructure to highlight promotions, launch new items, or organize inventory using visual branding and structural hierarchy.
Visual Disruption4 and The "Power Wing5"
Shoppers today suffer from massive "Decision Fatigue." Walking down an aisle at a superstore like Walmart or Target, they are bombarded by thousands of similar boxes on long, straight metal shelves. If your product is just one of fifty boxes on a standard gondola shelf, you are relying on luck.
A Retail Shelving Display—specifically what we call a "Sidekick" or "Power Wing"—is the antidote to this clutter. It creates "Visual Disruption." By hanging a cardboard unit off the side of the end-cap or shelving upright, you physically isolate your product from the competition. Cardboard allows for curvy, die-cut header shapes that metal shelves can't achieve. This breaks the straight lines of the aisle.
However, designing these isn't just about making them pretty. It's about compliance with US retailer standards. A standard US Sidekick needs to fit specific dimensions to avoid getting kicked off the floor. We standardize our sidekick bodies to exactly 48 inches (122 cm) in height and 14 inches (36 cm) in width. Why these numbers? Because they fit 90% of US retail fixtures (like Lozier or Madix gondolas) while leaving clearance for the mop guard at the bottom. If you make it 50 inches (127 cm) tall, it might hit the shelf above or drag on the wet floor. I've had to scrap production runs because a designer wanted a "taller" look that simply didn't fit the physical reality of the store fixture.
| Feature | Standard Metal Shelf | Cardboard Sidekick Display |
|---|---|---|
| Visual Impact | Low (Blends in) | High (Disrupts aisle flow) |
| Shape | Linear / Straight | Custom Die-cut / Curvy |
| Branding | Shelf Strip Only | Full Body Print & Header |
| Placement | Fixed in Aisle | End-caps / Cross-merchandising |
| Cost | Capital Expenditure | Marketing Expense (Temporary) |
I tell clients that a shelf holds product, but a display sells it. By moving your product off the metal rack and into a dedicated custom cardboard wing, you control the entire visual context, instantly curing the shopper's decision fatigue.
How to set up retail store displays?
Even the most beautiful display is useless if the store staff can't figure out how to build it in under five minutes.
To set up retail store displays efficiently, store personnel should follow this execution sequence:
Verify the Footprint: Confirm the aisle location matches the planogram dimensions before unpacking.
Scan for Assembly: Use the QR code on the master carton to watch the 30-second video guide.
Construct and Secure: Unfold the pre-glued unit and lock it to the gondola using universal metal brackets.

The "Zero-Frustration" Assembly Protocol
I have seen thousands of dollars of marketing budget wasted in the backroom of a store. Why? Because the assembly instructions were a dense page of text, and the 19-year-old stock boy just threw them away. If a Sidekick display takes more than 5 minutes to assemble, it doesn't get built. It gets trashed.
We realized that "Easy Assembly" isn't a bonus; it's a survival requirement. That's why we ditched paper manuals. We now print a giant QR code directly on the outside flap of the shipper box. This links to a 30-second YouTube video that shows the exact folding sequence. No reading required.
But the biggest setup killer is missing hardware. You need plastic clips or S-hooks to hang the display on the wire rack. In a busy retail environment, these tiny bags of parts get lost immediately. To fix this, I implemented the "Red Bag" strategy. We tape a bright red emergency bag to the front of the instruction sheet containing 5% extra hardware. If a clip drops under a pallet, the employee doesn't have to hunt for it. Also, regarding the actual attachment: we strictly use "Universal Metal Bracket6s" instead of cheap cardboard tabs. Cardboard tabs rip under weight. A metal bracket costs me $0.40 more, but it guarantees the display locks securely onto a standard Lozier or Madix upright without sagging.
| Assembly Issue | Traditional Method | The "Shop Floor" Solution |
|---|---|---|
| Instructions | Paper Manual (Ignored) | QR Code Video Link7 |
| Hardware Loss | Exact Count in Clear Bag | "Red Bag" (5% Spares) |
| Mounting | Cardboard Tabs (Weak) | Universal Metal Bracket |
| Time Limit | 15+ Minutes | < 5 Minutes (Pre-glued) |
My rule for setup is simple: If you need a screwdriver, I've failed. The entire unit should unfold and lock into place using "Pre-Glued Modular Trays," reducing the labor to a simple "Open, Stack, and Lock" process.
How do you display items on shelves?
Simply placing products in rows is not merchandising; it's storage. You must actively manage how the product faces the consumer.
To display items on shelves for maximum sell-through, merchandisers should apply these visual strategies:
Utilize the Strike Zone: Place high-margin "Hero" products at eye level (50–54 inches / 127–137 cm).
Implement Angled Facings: Tilt lower shelves upward by 15 degrees to improve label readability.
Illuminate Shadow Zones: Use white inner liners to reflect light onto bottom-shelf merchandise.
Gravity Physics and Shadow Reduction
There is a physics to displaying items that most designers ignore. First, let's talk about the "Chin-Up" angle. When products are placed on lower shelves—around knee or thigh height—the label is vertical, meaning it's facing the customer's shins, not their eyes. To read it, they have to step back. They won't. I fix this by structurally angling the bottom two shelves upward by 15 degrees. This simple tilt makes the product "look up" at the shopper, increasing label readability by 100% from a standing position.
Then there is the issue of lighting. Retail store lighting comes from the ceiling. If you have a deep shelf with solid cardboard sidewalls, the products in the back and on the bottom shelves sit in a "Shadow Zone." Dark products don't sell. I don't rely on the store's electricity. I use "White Inner Liners"—a bright white coating on the inside walls of the display—to act as a reflector. This bounces ambient light into the deep corners of the shelf, illuminating the product without batteries or LEDs.
Finally, we have to deal with the "Lip Height" mistake. I see so many PDQ trays with a 3-inch (7.6 cm) front lip that hides the bottom half of the product. The lip is there to hold the product in, not to be a billboard. I enforce a strict "Product First" rule: the front lip should never cover more than 15% of the product face. If the product is unstable, we use a clear PVC front or a die-cut dip. The packaging is the hero, not the cardboard tray.
| Display Strategy | Common Failure | Technical Fix |
|---|---|---|
| Lower Shelves | Vertical Facing (Hard to read) | 15° "Chin-Up" Angle |
| Lighting | Dark Corners / Shadows | White Reflective Inner Liner8 |
| Retention | High Front Lip (Hides Product) | Low Profile / PVC Window |
| Stability | Tipping Forward | 12-18° Gravity Feed Slope |
I once had a client argue for a high front lip to print their logo. I refused. I told them, "If the customer can't see the flavor name because your logo is blocking it, they won't buy it." We lowered the lip, and sales went up.
Conclusion
Effective retail shelving isn't just about making things look nice; it's about engineering the setup speed and the viewing angles to match human behavior.
Stop guessing with your shelf layouts. Get a Free Structural 3D Rendering or a Physical White Sample from me, and I'll show you exactly how the "Chin-Up" angle can double your visibility.
Exploring the concept of the Strike Zone can help you maximize sales by positioning high-margin products effectively. ↩
Understanding the Human Height Heat Map can enhance your retail strategy by optimizing product placement for better visibility. ↩
Discover the importance of the Stoop Zone for placing bulk items and how it affects shopper behavior. ↩
Learn about Visual Disruption's impact on shopping experiences and decision-making, crucial for effective retail strategies. ↩
Explore this link to understand how Power Wings enhance product visibility and sales in retail environments. ↩
Learn why Universal Metal Brackets provide a more secure and reliable solution for display assembly compared to traditional methods. ↩
Explore how QR code video links can enhance assembly efficiency and reduce frustration in retail environments. ↩
Explore this link to understand how White Reflective Inner Liners can enhance product visibility and sales in retail environments. ↩


