Missing a product launch date is a retail nightmare. You need displays ready to catch the seasonal rush, but unexpected production delays can ruin your entire marketing schedule.
Production for custom counter displays typically takes 10 to 15 days after sample approval. This includes printing, die-cutting, and gluing. However, complex designs or large quantities over 5,000 units may extend the timeline to 20 days. Always allow 3 extra days for prototyping.
Time is money in the retail world. Understanding the specific timelines for different display types helps you plan your inventory flow correctly and avoid expensive air freight costs. Let's break down the schedules.
How long does it take to get custom countertops?
Waiting for retail fixtures is stressful when you have products ready to ship. You want to know exactly when your product will sit on the checkout counter.
Custom countertop displays usually require 12 to 14 days for manufacturing. This timeline starts once you approve the structural design and artwork. Shipping from China to the US takes an additional 25 to 35 days by sea, so total lead time is often 6 to 8 weeks.
The Timeline Anatomy of a Countertop Unit
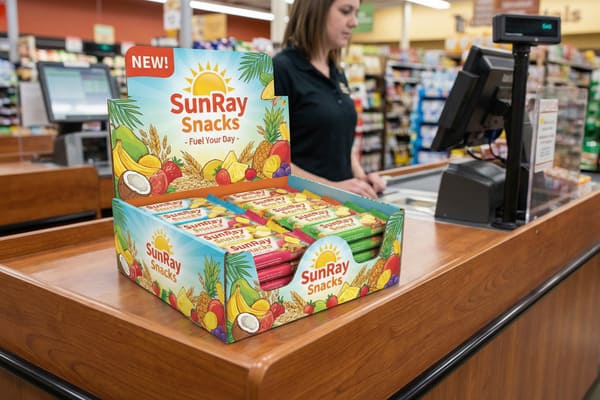
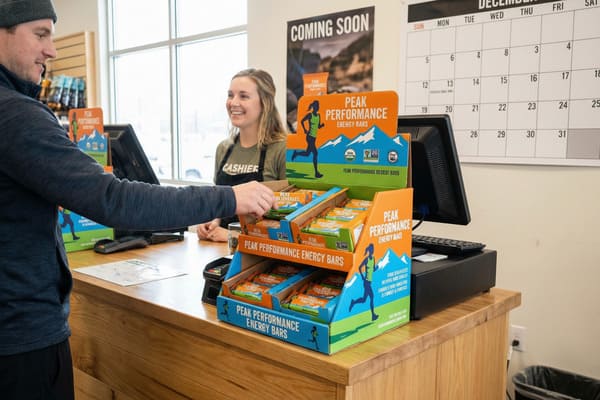
When we talk about "countertops1" in the display industry, we refer to the Point of Purchase (POP) units that sit on retail counters. The production timeline is dictated by several technical stages that cannot be rushed without risking quality. First, the material selection phase takes about 2 days. For a standard counter display, we typically use 350g CCNB (Clay Coated News Back) mounted onto B-flute corrugated board. This material is strong enough to hold small items like cosmetics or confectionery but smooth enough for high-quality printing.
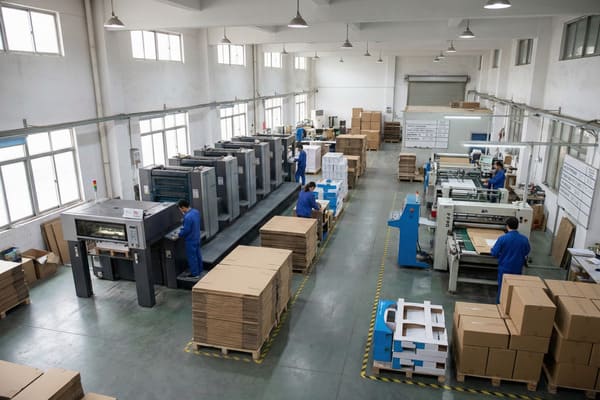
The printing phase is where the real magic happens, and it consumes about 3 to 4 days. We use offset printing presses, often Heidelberg or Roland machines, which require making plates for each color (CMYK). If your design has specific Pantone colors to match your brand identity, the ink setup takes longer. After printing, the sheets must dry completely before we can move to surface treatment. If we rush the drying process, the lamination (glossy or matte PP) will bubble or peel off later in the store.
The final 5 days involve die-cutting2 and gluing. We make a custom cutting die, which is a wood board with steel blades embedded in the shape of your display. The die-cutting machine punches thousands of sheets an hour. Then, the gluing team folds and glues the edges. In my factory, we have 3 production lines running simultaneously to handle this volume. We also perform a "Drop Test" during this phase to ensure the glue holds up during transport. If the glue is not fully cured, displays can pop open in the shipping container due to humidity changes at sea.
| Production Phase | Est. Time (Days) | Key Activities | Risk Factors |
|---|---|---|---|
| Structural Design3 | 1-2 | CAD Drawing, White Sample | Unstable structure |
| Pre-Press | 1-3 | Plate making, Color Proofing | Color mismatch |
| Printing & Drying4 | 3-4 | Offset Printing, Ink Drying | Smudging, Ghosting |
| Post-Press | 2-3 | Lamination, UV Coating | Peeling film |
| Cutting & Gluing | 3-5 | Die-cutting, Assembly | Weak adhesive |
| Packing | 1-2 | Flat packing into cartons | Shipping damage |
I know that speed matters to you, but structural integrity matters more. My team uses automated gluers to cut assembly time by 30%, ensuring your counter units hit the ship date without sacrificing the strength needed for heavy retail items.
How long does it take to make custom cabinets?
Large floor stands act like temporary cabinets in a store. You worry about stability and how long it takes to engineer a structure that won't collapse.
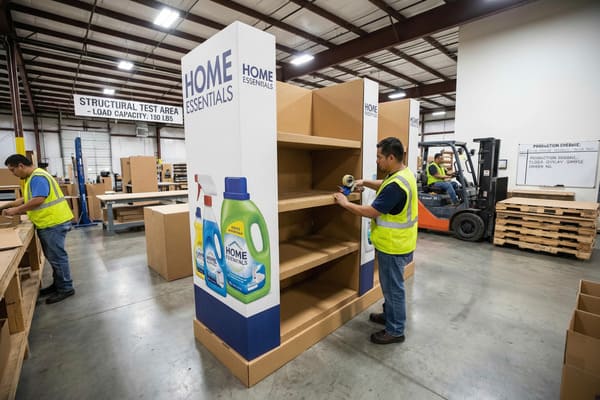
Manufacturing custom floor display cabinets takes approximately 15 to 18 days. These units are larger and require stronger corrugated material like double-wall B+C flute. The process involves complex structural testing to ensure they hold heavy products without collapsing in retail environments.
Structural Engineering and Production Speed
Producing floor displays, which often function as product cabinets, is a more involved process than making small counter units. The primary reason for the longer timeline is the material requirement and the physical size of the components. For these "cabinets," we cannot use simple single-wall cardboard. We must use double-wall corrugated board5, typically EB-flute or BC-flute, to ensure the unit can support weights of 20kg to 50kg. Sourcing and conditioning this heavy-duty board takes an extra 2 to 3 days compared to standard materials.
The printing process for floor cabinets is also different. Because the flat sheets are huge, sometimes exceeding the size of standard offset presses, we might need to print in multiple sections and laminate them onto the cardboard separately. This lamination process (mounting) requires precision; if the alignment is off by even 2 millimeters, the final folded cabinet will look crooked. This step adds about 4 days to the schedule. Furthermore, because these displays stand on the floor, they are subject to "mop water" damage in supermarkets. We often add a waterproof coating to the base, which requires additional curing time.
A critical part of the timeline that buyers often overlook is the pre-assembly testing. Unlike counter displays, floor cabinets are often shipped flat-packed to save on logistics costs. This means the end-user (store clerk) has to assemble it. We spend at least 2 days creating an instruction manual and testing the assembly speed. If it takes more than 5 minutes to build, retailers like Walmart or Costco might reject it. We also conduct an Edge Crush Test (ECT)6 to verify the stacking strength. If the humidity in the factory is high, we must let the finished boards dehumidify in a controlled room for 24 hours before packing, or they will arrive soft and unusable.
| Feature | Counter Display | Floor Cabinet Display | Impact on Time |
|---|---|---|---|
| Material | Single Wall (E/B Flute) | Double Wall (BC/EB Flute) | +2 Days for sourcing |
| Print Size | One piece | Multi-piece mounting | +3 Days for mounting |
| Structural Test | Load bearing | ECT & Stability Tilt Test | +1 Day for testing |
| Packing | Simple flat pack | Complex fold + Accessories7 | +2 Days for packing |
| Total Lead Time8 | 12-14 Days | 15-18 Days | Slower production |
We test every floor cabinet design with weighted sandbags before starting mass production. I insist on this step to prevent the nightmare of in-store collapse, even if it adds one day to our internal schedule, because your brand reputation depends on that stability.
How fast can you get countertops?
Sometimes you have a sudden opportunity. You need to know the absolute fastest turnaround time for an emergency promo or unexpected retail slot.
For rush orders, we can produce countertops in as little as 7 to 9 days. This requires using stock materials and digital printing instead of offset. While faster, unit costs may be 15% higher, and special finishes like foil stamping might be unavailable.

Accelerating Production Without Quality Loss
When a client tells me they need displays "yesterday," we switch from our standard workflow to our "Rapid Response" protocol. To achieve a 7-day turnaround, we have to bypass certain traditional steps. The biggest time-saver is switching from offset printing to digital printing9. Offset requires making physical plates and setting up ink stations, which takes days. Digital printing is direct-to-paper, similar to a giant office printer but with industrial quality. It allows us to start printing minutes after you approve the file. However, digital print might not hit exact Pantone colors as perfectly as offset, which is a trade-off you must accept for speed.
Another way we compress the timeline is by using stock cutting dies. If you can adapt your design to a standard size that we already have a mold for, we save the 2 days usually needed to manufacture a new steel die. We also utilize automated cutting tables10 (like Kongsberg cutters) for smaller batches, which eliminates the need for dies entirely, though this is slower per unit and only viable for runs under 500 pieces.
We also adjust the finishing process. Instead of a slow-drying oil varnish, we use an aqueous coating or UV drying system that cures instantly. This allows us to move sheets directly from the printer to the cutter without waiting 24 hours for drying. However, this speed comes with a financial cost. Running shifts overnight to meet a deadline increases labor costs, and digital ink is more expensive than offset ink. Additionally, for rush orders, we highly recommend air shipping at least a portion of the order (e.g., 100 units) to ensure they arrive for the launch, while the rest follow by sea. This hybrid logistics strategy is the only way to truly meet tight deadlines from China.
| Method | Printing Tech | Setup Time | Cost Impact | Speed (500 units) |
|---|---|---|---|---|
| Standard | Offset | High (Plates) | Low | 12 Days |
| Rush | Digital11 | None | +15-20% | 7 Days |
| Cutting | Die Cut12 | 2 Days (Mold) | Low | Fast once set up |
| Rush Cutting | CAD Table | None | High | Immediate start |
I often advise clients to air ship a small batch for the immediate launch and send the rest by sea. My factory runs 24-hour shifts during peaks to meet these tight deadlines for partners like you, ensuring you never miss a sales window.
Conclusion
Planning your display production timeline carefully ensures you save on costs and avoid stress. Always factor in design time, production days, and shipping to hit your retail dates perfectly.
Explore this link to discover the best materials for creating effective and durable retail display countertops. ↩
Learn about die-cutting techniques and their importance in producing high-quality retail displays. ↩
Explore this link to understand essential practices that ensure stability and efficiency in structural design. ↩
This resource will provide insights into overcoming challenges like smudging and ghosting in printing. ↩
Understanding double-wall corrugated board is essential for grasping its strength and durability in structural applications. ↩
Exploring the Edge Crush Test will reveal its significance in ensuring packaging strength and reliability. ↩
Exploring complex fold packaging can enhance your display's appeal and functionality, leading to better sales. ↩
Understanding total lead time is crucial for optimizing production schedules and improving efficiency. ↩
Explore the benefits of digital printing, including speed and flexibility, to understand why it's a game-changer for rapid production. ↩
Learn how automated cutting tables enhance efficiency and reduce production time, making them essential for modern manufacturing. ↩
Explore the advantages of Digital printing, including speed and cost-effectiveness, to enhance your printing projects. ↩
Learn about Die Cut printing techniques and their unique applications to elevate your design and production capabilities. ↩


