Retail staff often ignore displays that are too difficult to build. If your cardboard units take too much time to set up, they might end up in the trash instead of the sales floor.
Yes, most modern floor display boxes are designed for assembly in under three minutes. They typically use pre-glued structures, pop-up mechanisms, or simple tab-lock systems that require no tools, ensuring store staff can set them up quickly without frustration.
Assembly speed is not just about convenience; it is about retail compliance. If a display is complicated, store employees will avoid it. We need to understand the mechanics that make assembly fast and reliable.
How to put a display box together?
Staring at a flat cardboard sheet can be confusing for inexperienced store staff. Without a clear plan, you risk damaging the structural integrity before the product is even loaded onto the shelves.
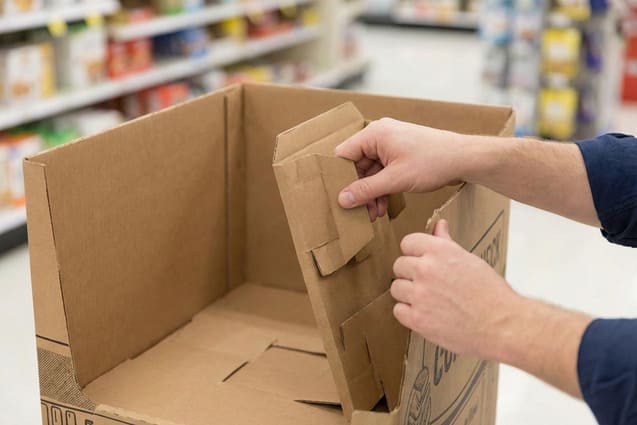
Start by laying the flat display on a clean surface. Fold along the pre-scored crease lines to form the main body, then lock the bottom tabs into place. Insert any internal shelves or dividers, and finally, attach the header card to the top for branding visibility.

The Structural Anatomy of Quick Assembly
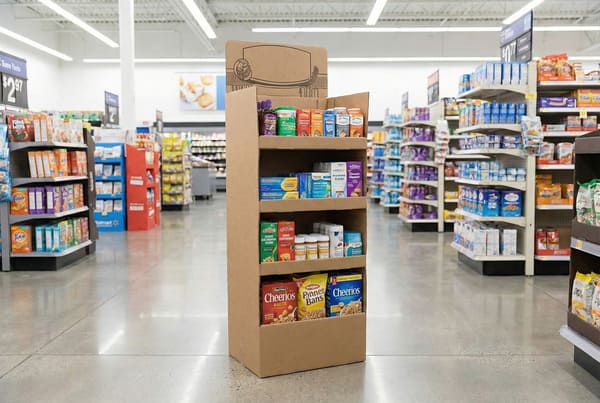
The process of putting a display box together relies heavily on the engineering done before the cardboard even reaches the store. In the Cardboard Displays industry, we see a major shift toward "flat-pack" designs that pop open instantly. This is crucial because the global Point of Purchase (POP) market is growing, and retailers like Walmart or Costco have strict time limits for merchandising. A standard floor display is usually made from corrugated board, often B-flute or EB-flute, which offers a balance between print surface quality and structural strength.
When you assemble a display, you are essentially converting a 2D sheet into a 3D load-bearing structure. The most common design for quick assembly uses a pre-glued spine. This means the factory has already done the hard work. The store associate simply needs to push the sides of the box, and the tension creates the shape. If the design requires manual folding, it usually involves a "roll-over" side panel. This is where you fold the cardboard over itself to create a double wall. This double-wall structure1 is vital for weight capacity. A single wall might hold 5kg per shelf, but a rolled-over double wall can support up to 15kg or more, depending on the material grade.
Another technical aspect is the "shelf locking2" mechanism. Modern displays use tabs that click into the side walls. This locks the geometry of the box. If these tabs are loose, the box will twist. High-quality manufacturing ensures that the die-cut slots are precise to the millimeter. If the cuts are too tight, the assembler rips the paper trying to force it. If they are too loose, the shelf falls. The goal is a "friction fit3" that holds tight without needing tape or glue in the store.
| Assembly Feature | Time to Build | Structural Strength | Best Use Case |
|---|---|---|---|
| Pop-Up (Pre-glued) | 30 – 60 Seconds | Medium (Up to 10kg/shelf) | Light products, fast retail rollout |
| Manual Tab-Lock | 3 – 5 Minutes | High (Up to 20kg/shelf) | Heavy items (Beverages, Tools) |
| Hybrid Design | 2 – 3 Minutes | Very High | Custom shapes, premium cosmetics |
I know that time is money for your retail partners, and delays lead to lost sales. That is why we test every design in our factory to ensure it assembles in under three minutes, and we always include a clear, diagram-based instruction sheet in every carton.
How to assemble a display board?
Display boards, or header cards, carry your most vital branding and marketing messages. If they are attached loosely or sit crookedly on top, the entire professional look of your promotion is ruined.
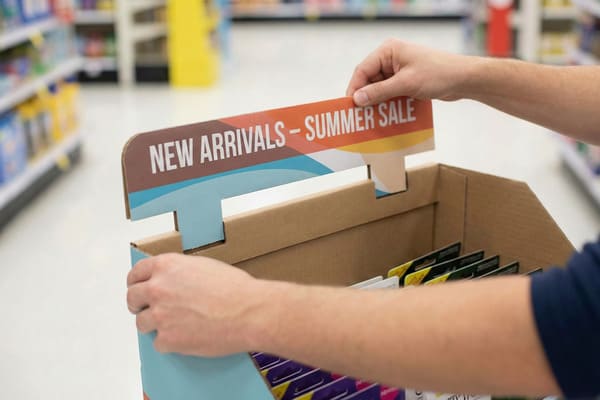
Locate the slots on the top of the main display body. Align the tabs on the display board or header card with these slots and push them down firmly until they click. Ensure the board stands upright and is not leaning forward or backward for maximum stability.
Optimizing Brand Visibility Through Structure
The header board is the billboard of your display. In the industry, we call this the "communicator" because it is the first thing a customer sees from a distance. Assembling this part correctly is non-negotiable. From a structural standpoint, the header is usually a separate piece of corrugated board. This is done to keep the shipping carton size small. If the header were permanently attached, the shipping box would be too tall, increasing logistics costs significantly.
The assembly challenge here is fighting gravity and wear. A common technical issue is the "floppy header4." This happens when the tabs that insert into the main body are too short or the cardboard flute direction is vertical rather than horizontal. If the flute runs vertically, the tabs can bend easily, causing the sign to lean. We often use a "U-fold5" or a plastic clip accessory to secure these boards. For high-traffic areas, plastic clips are superior because they bite into the cardboard and prevent the sign from being knocked off by passing shopping carts.
Furthermore, 2024 trends show a rise in interactive headers6. Brands are adding QR codes or even small digital screens to these boards. This adds weight. If you are assembling a header with a digital component, the connection points must be reinforced. A standard single-wall header cannot support a battery pack or screen. In these cases, we must use a laminated double-layer board7. The assembly then involves not just inserting tabs, but potentially securing a lock-nut or a Velcro strip. The person assembling it must ensure the alignment is perfect, or the digital code will be unscanable, wasting the marketing investment.
| Header Type | Assembly Method | Stability Level | Cost Impact |
|---|---|---|---|
| Standard Tab | Insert into top slots | Low (Prone to leaning) | Low |
| Fold-Over | Integrated into body | High (Very rigid) | Medium (Uses more material) |
| Clip-On | Plastic fasteners | Maximum (Locked tight) | High (Hardware cost) |
I always advise my clients to use a double-fold design for headers to increase rigidity without needing extra plastic parts. We print assembly icons directly on the hidden tabs so store employees know exactly which direction the board faces without guessing.
How to assemble the bottom of a box?
The bottom is the foundation of your entire display unit. If you get this step wrong, the display will collapse the moment you load your heavy products onto the shelves, creating a safety risk.
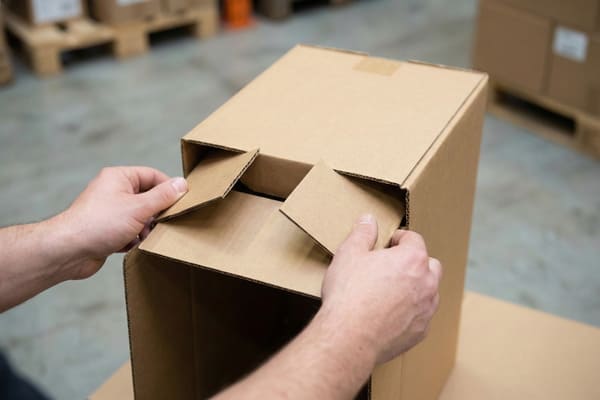
Flip the display body over to access the bottom flaps. Fold the smaller side flaps in first, followed by the larger major flaps. If it is an auto-lock bottom, simply push the sides together and the center will snap into place automatically without tape.
Base Engineering and Load Dynamics
The bottom of a cardboard display is the most critical engineering point. It has to handle the static load of the product plus the dynamic stress of being moved around a store. In the packaging industry, we look at two main types of bottom assemblies: the "1-2-3 Bottom8" (Snap Lock) and the "Auto-Bottom9" (Crash Lock).
The Snap Lock is common because it is cheaper to manufacture. It requires the user to fold four specific flaps in a sequence to lock them. While cost-effective, it introduces human error. If the store staff skips a step, the bottom opens up. The Auto-Bottom is superior for heavy goods like beverages or tools. It is pre-glued at the factory. When the user opens the box, the bottom flaps automatically slide into a locked position. This mechanism uses the weight of the product to reinforce the lock—the heavier the product, the tighter the seal.
Another factor is moisture protection10. Floor displays sit on the ground, where mopping happens. Cardboard acts like a sponge. During assembly, high-end displays often include a "mop guard" or a waterproof coating on the bottom inch. If the assembly instructions do not specify adding a plastic tray or base reinforcement, the structural integrity of the bottom will fail within days in a humid environment. For pallet displays11, the bottom assembly is different; the display is often strapped directly to a wooden pallet. Here, the assembly focus shifts from folding flaps to securing the "skirt" that hides the ugly wooden pallet base.
| Bottom Style | Setup Time | Weight Capacity | Manufacturing Cost |
|---|---|---|---|
| Standard Flaps | Slow (Requires tape) | Low | Lowest |
| 1-2-3 Snap Lock | Medium (Manual fold) | Medium | Low |
| Auto-Bottom | Instant (Automatic) | High | High (Gluing required) |
I strongly recommend the crash-lock bottom for heavy items because it combines speed with strength. We use high-grade adhesive in our factory to pre-glue these bottoms, saving your retail partners frustration and preventing dangerous collapses.
What are common box folding mistakes?
Even the best designs fail if they are assembled poorly by rushing staff. Avoid these frequent errors to ensure your display lasts through the entire promotional cycle and keeps your products safe.
Common mistakes include folding against the grain, forcing tabs into the wrong slots, and neglecting to lock the bottom flaps securely. These errors weaken the structure, causing shelves to sag or the entire unit to lean, which creates a safety hazard in the store.
Analyzing Structural Failures in Retail
The gap between a prototype in a design lab and a display in a chaotic retail store is often where failure happens. The most common technical mistake is "breaking the grain12." Corrugated cardboard has a grain direction, similar to wood. Structural folds are scored to bend with or perpendicular to the grain depending on the load requirement. If a user forces a fold where there is no score line, or folds it backward against the natural resistance, the inner strength of the paper liner snaps. This can reduce the vertical compression strength13 (BCT) by up to 50%.
Another frequent error involves the internal dividers. Many people think dividers are just for organizing product. They are not. They are structural columns. If a display has two shelves, the dividers transfer the weight from the top shelf to the bottom shelf and then to the floor. If a user throws these dividers away thinking they are extra packaging, the shelves will bow in the middle. This is common with heavy items like shampoos or canned goods.
We also see issues with "tab tearing14." When a user tries to insert a tab into a slot, they often push too hard. If the tab delaminates (splits into layers), it loses its friction grip. This causes shelves to pop out when a customer takes a product. Finally, ignoring the "insert pad15" is a classic mistake. This is a flat piece of cardboard placed at the very bottom inside the box. It distributes the weight evenly across the flaps. Without it, heavy products will punch right through the center of the bottom assembly.
| Mistake | Consequence | Prevention Method |
|---|---|---|
| Folding Backward | Cracks liner, weakens walls | Follow score lines strictly |
| Skipping Dividers | Shelf collapse/sagging | Mark parts as "Required" |
| Missing Base Pad | Bottom failure | Glue pad to bottom flap |
I have seen too many great designs fail because of poor assembly in the store. We solve this by providing a QR code on the box that links to a 30-second video tutorial, showing exactly how to fold it correctly.
Conclusion
Cardboard displays drive sales only when they stand tall and look professional. By focusing on smart engineering and clear assembly steps, we protect your brand image and ensure product safety.
Learn about double-wall structures and their importance in supporting heavier loads, crucial for effective merchandising. ↩
Understanding shelf locking can enhance your packaging strategy, ensuring stability and efficiency in retail displays. ↩
Exploring friction fit mechanisms can help you optimize your packaging for better performance and cost-effectiveness. ↩
Understanding the causes of a floppy header can help you avoid common pitfalls in display assembly. ↩
Exploring the benefits of U-folds can enhance your knowledge of effective display assembly techniques. ↩
Explore how interactive headers can enhance customer engagement and improve marketing effectiveness. ↩
Learn about the structural advantages of laminated double-layer boards for supporting digital components. ↩
Explore this link to understand the advantages and applications of the 1-2-3 Bottom assembly in packaging. ↩
Discover how the Auto-Bottom assembly enhances packaging efficiency and reliability, especially for heavy products. ↩
Understanding moisture protection can enhance display longevity and effectiveness, ensuring your investment lasts. ↩
Exploring pallet displays can provide insights into efficient assembly and design, optimizing your display strategy. ↩
Understanding 'breaking the grain'is crucial for avoiding structural failures in retail displays. ↩
Learn about vertical compression strength to enhance your packaging strategies and prevent failures. ↩
Understanding tab tearing can help improve packaging design and prevent product damage during shipping. ↩
Learn about the importance of insert pads to ensure product safety and stability in packaging. ↩


