
I see shoppers move fast. I also see displays that stop them. I solve that gap. I use simple rules, strong structure, and clear branding. Then I test, fix, and ship.
Start with the product and shelf rules, then set size, structure, and messaging. Use three brand cues, one CTA, and one hero benefit. Choose recyclable board, test load and transport, and run a color-managed proof before mass printing.
I want you to get wins fast. So I start simple. I give you steps you can act on today. Then I go deeper into tools, options, and materials you can choose with confidence.
How to design a box packaging on Canva?
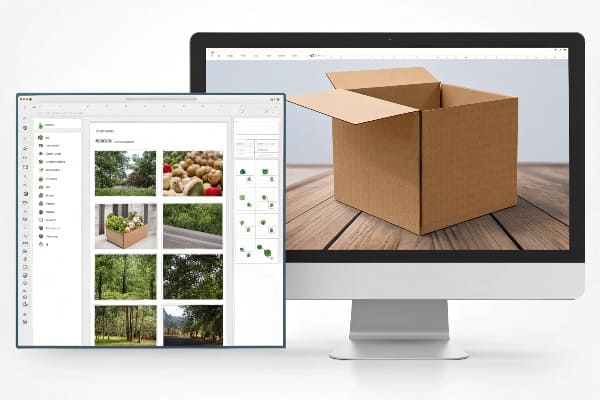
Design can look hard. Deadlines make it worse. Canva makes the first pass fast. I keep structure and print rules in mind while I move blocks and text.
Pick a dieline, set brand colors, add a hero image and benefit, limit text, export CMYK print-ready PDF, then order a sample to check color and fit.
Why Canva works and how I make it print-safe
I use Canva for speed, not for final print color. I set a real dieline1 first. I bring in a box template that matches the corrugate flute and thickness. I turn on rulers and set a layout grid with equal gutters. I place the logo top-left or centered, depending on the brand. I keep one clear message on the primary panel. I mark bleed at 3 mm and safe zones at 5 mm from cuts and folds. I avoid tiny type near folds. I convert text to outlines when needed. I export a print PDF2 with crop marks and bleed. I send that PDF and a low-res JPG to the client for quick feedback. I then order a digitally printed sample to check color shift under store lights. I do a tape-up on the actual flute to confirm creases. I record notes on cracking and fiber direction. I then lock the file and pass it to prepress.
Canva setup checklist
| Step | Action | Why it matters |
|---|---|---|
| 1 | Import dieline as SVG/PDF | Align art to real cuts and folds |
| 2 | Set 3 mm bleed, 5 mm safe | Prevent trim errors |
| 3 | Load brand palette | Keep color consistent |
| 4 | Use 1 hero image | Focus shopper attention |
| 5 | Add one CTA | Drive action fast |
| 6 | Export CMYK PDF | Hand-off to printer |
| 7 | Order sample | Catch color and fit issues |
| 8 | Tape-up on real flute | Check creases and cracking |
What are custom display boxes?
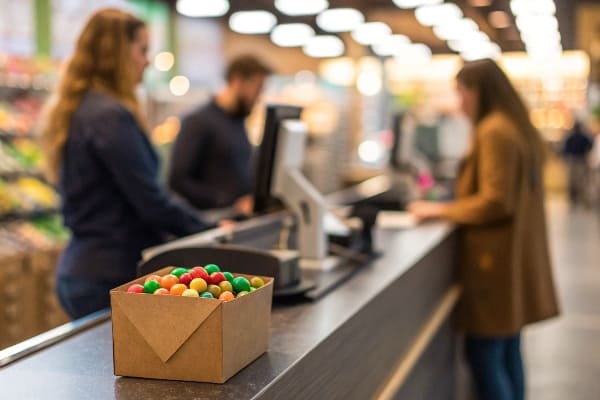
Buyers want fit, not guesswork. Custom display boxes give that fit. I design to the SKU, the shelf, and the shopper path.
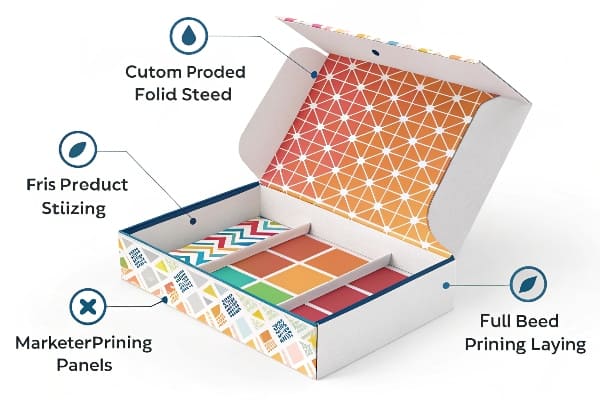
Custom display boxes are brand-tailored cartons or trays that hold, present, and ship products in one unit, sized to the SKU and shelf, with printed branding, easy setup, and recyclable materials.
What "custom" really changes for sell-through
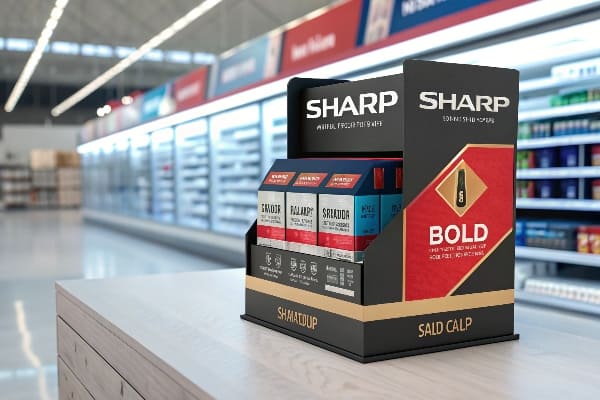
Custom means the structure, print, and pack-out match the job. I choose single-wall E or B flute for most counter units. I shift to double-wall for floor units with heavy gear. I place auto-lock bases where staff need speed. I add tear-away fronts for PDQ tray3s in club stores. I print bold panels with three brand signals: logo, color, and pattern. I add a one-line benefit that fits eight words or less. I design a QR code only if it adds value, like a quick setup video. I keep inks water-based when possible. I avoid plastic lamination unless the environment is wet. I use spot UV or emboss only when the run size allows cost recovery. I check pallet math so the outer ships in full layers. I set master carton marks large for warehouse picks. I plan repeat orders with the same dieline to cut cost.
I made a hunting accessory display last year. The buyer, David from Barnett Outdoors, asked for strong branding and a hard deadline. I built a PDQ tray that doubled as a shipper. I ran strength tests with sandbags. I hit color targets with a GRACoL proof. The unit rolled out on time for the season launch.
Custom display box options at a glance
| Option | Best for | Notes |
|---|---|---|
| PDQ tray + tear-off | Club and mass | Ships full, sets fast |
| Countertop gravity | Small packs | Uses front window, easy refills |
| Shipper display | E-comm to store | One box for freight and display |
| Floor stand with shelves | New launches | Big presence, needs bracing |
| Hook or peg add-ons | Carded items | Keep hook load under spec |
| Header card | Price and promo | Swap headers for seasons |
What are cardboard display boxes?
Cardboard display boxes look simple. The value sits in structure and print. The right board makes the unit hold, ship, and still look good.
Cardboard display boxes are corrugated or paperboard units designed to present products at retail, using cut, fold, and print to balance strength, cost, and brand impact.
Strength, cost, and sustainability in one plan
I start with the load. I add a 2.0 safety factor4 for floor units and 1.5 for counter units. I choose flute by span and weight: E for fine print and short spans, B for general use, EB for heavy shelves. I align flute direction with the longest unsupported span. I add crash-lock or auto-lock bases to cut setup time. I design tabs and slots so staff can assemble without tools. I keep dielines compact to save board and freight. I specify water-based inks5 and recyclable coatings6. I avoid film lamination when I can. I use nano or aqueous coatings when the environment is damp. I run drop tests from realistic heights. I check edge crush and burst with the supplier. I use digital print7 for short runs and seasonal art. I move to flexo or litho-lam when volume rises. I document color targets in a one-page spec and share it with the print floor.
I work in China with three production lines. I control design, samples, tests, and mass runs in one place. I accept small losses in sampling because repeat orders pay back. I keep proofs, dielines, and QC photos on file. This habit protects color and strength across reorders.
Board, print, and setup matrix
| Aspect | Choice | When I pick it | Trade-off |
|---|---|---|---|
| Board | E flute | Fine print, small spans | Lower crush vs. B |
| Board | B flute | General retail units | Heavier than E |
| Board | EB double | Heavy floor units | Higher cost |
| Digital | Short runs, fast changes | Unit cost higher | |
| Flexo | Large runs, spot colors | Lower image detail | |
| Litho-lam | High image, large runs | Longer lead time | |
| Setup | Auto-lock base | Fast store setup | Slightly higher blank cost |
| Coating | Aqueous | Recyclable, low gloss | Less scuff resistance |
Conclusion
Design to the product, the shelf, and the shopper. Keep one message. Prove strength and color with samples. Then scale with the same dieline.
Understanding dielines is crucial for packaging design; this resource will guide you through the process effectively. ↩
Explore this link to learn how to create high-quality print PDFs that ensure your designs look great in print. ↩
Learn about PDQ trays and their benefits in retail settings, including how they can streamline product displays and improve sales. ↩
Understanding safety factors is crucial for ensuring structural integrity and safety in design. ↩
Explore the benefits of water-based inks for sustainability and health in printing processes. ↩
Discover how recyclable coatings contribute to sustainability and environmental responsibility in packaging. ↩
Learn how digital printing can enhance efficiency and flexibility for short production runs. ↩


