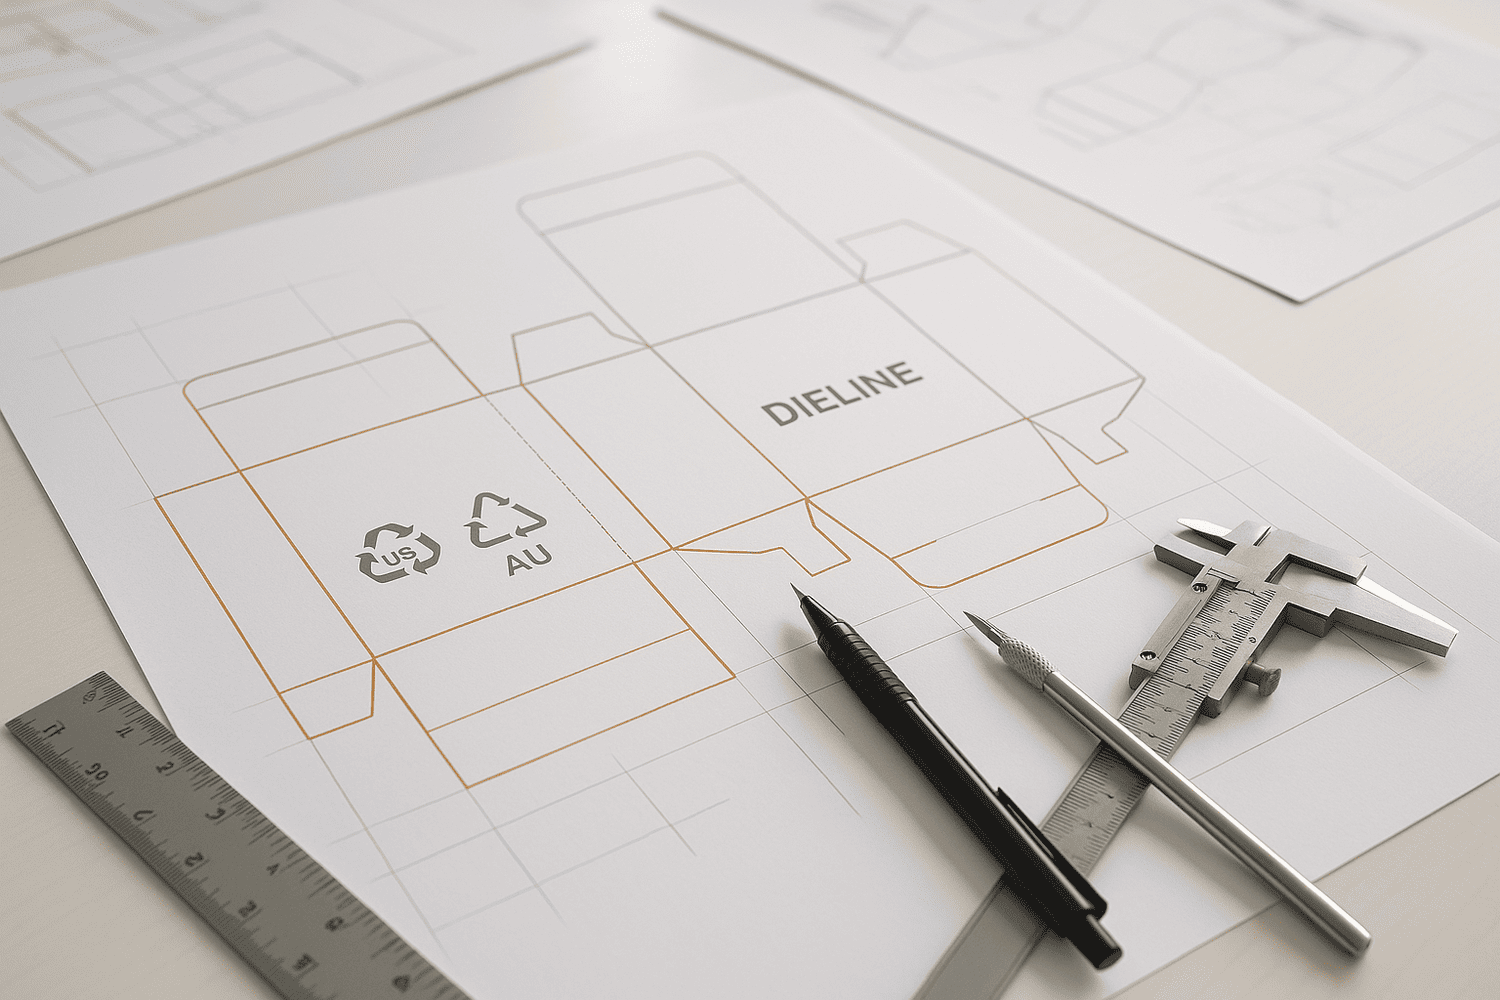
我遇到的问题和很多品牌一样:一个展示架必须适配两个市场。返工既费时又费钱。我采用一套主模切线系统,并将其调整以适应两个市场。.
在矢量 CAD 中构建一个主模切线,保留双单位(毫米和英寸),为 EAN-13 和 UPC-A 预留 GS1 条形码区域,映射到 AU 1165×1165 毫米和 US 48×40 英寸托盘,设置出血/安全/压痕余量,并通过物理原型进行验证。.

我销售B2B展示架,所以我的写作地点就在工厂车间。我负责设计、测试和发货。我的团队提供快速样品、免费调整和强度测试支持。以下是我的现场笔记。.
如何创建模切线?
我首先确定展示架的摆放位置。我列出零售商规则、托盘尺寸、产品重量和条形码类型。然后,我根据一个主图进行设计。.
我确定产品和零售限制,选择纸板和瓦楞纸板,设置切割和压痕层,保持出血和安全,规划 UPC/EAN 区域,为澳大利亚和美国进行托盘包装,制作样品,并在印刷前进行压力测试。.

我的分步搭建
我力求步骤简洁明了,方便团队和需要快速响应的买家查看。所有数值均以毫米和英寸为单位,以避免出错。我还锁定条形码静音区,因为美国买家使用 UPC-A 条形码,而许多澳大利亚买家使用 EAN-13 条形码。我总是尽早进行托盘化处理¹ 。美国仓库通常要求托盘尺寸为 48×40 英寸,而澳大利亚配送中心通常计划使用 1165×1165 毫米(CHEP)。我将两种尺寸的托盘尺寸图都保存在主文件中,并进行标记。我从一开始就考虑了产品的强度。狩猎装备和户外工具会增加重量,因此我在落地展示架上增加了更大的胶粘片和更宽的支脚。我进行跌落和震动²,因为运输过程中最先受损的是脆弱的支脚。我快速打印了一个数码样品,以确认颜色和字体大小是否适合年龄较大的顾客。我进行小批量生产,以确认在车间现场的组装时间。我保持模切线清晰,以便商店员工能够在几秒钟内读取模切线。
| 步 | 我做什么 | 为什么这很重要(澳大利亚 + 美国) |
|---|---|---|
| 1 | 定义产品尺寸/重量3 | 防止坍塌和倾斜 |
| 2 | 锁定零售规则 | 沃尔玛/塔吉特和科尔斯/伍尔沃斯的价格匹配 |
| 3 | 选择木板和笛子 | 平衡成本、印刷、强度 |
| 4 | 设置裁剪/折痕/出血 | 清晰的印刷和快速的准备工作 |
| 5 | 预留条形码区域 | UPC-A(美国)/ EAN-13(澳大利亚)静音区 |
| 6 | 地图托盘 | 美国标准尺寸 48×40 英寸 / 澳大利亚标准尺寸 1165×1165 毫米 |
| 7 | 原型制作与测试4 | 在批量印刷前发现错误 |
模切线的准则是什么?
我先制定规则再开始画图。规则能节省后续数小时的时间。我为两个市场都设置了清晰的图层、安全区域和标签需求。.
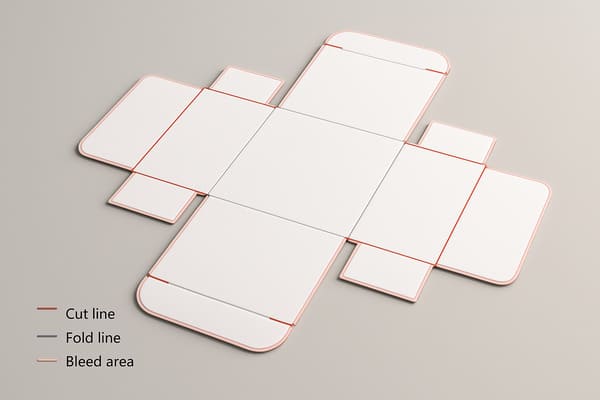
使用清晰的层名称、双单元、3-5 毫米出血、5-8 毫米安全区、条形码静音区、瓦楞/纹理注释、托盘图、胶合区和组装箭头;通过样品和跌落测试进行验证。.
我所依赖的跨市场规则
我制定了设计师和印刷团队可以严格遵循的指导原则,确保他们无需猜测。出血位保持在 3-5 毫米,对于较厚的瓦楞纸板,由于套准偏差较大,出血位增加到 6 毫米。安全标记距离切割线 5-8 毫米,距离防撞底板 10 毫米。我标注了瓦楞方向,以支撑垂直载荷。条形码区域留白5 毫米,作为静默区。我在设计稿中同时标注了 UPC-A 和 EAN-13 条形码选项,以便品牌方在后期选择,无需重新绘制。我添加了托盘和通道限制,因为美国仓库通道和澳大利亚配送中心的转弯和堆垛方式不同。我添加了简单的组装箭头;商店员工必须快速组装。如有需要,我会添加回收标记6 毫米。我使用低成本的数字打样来检查颜色。我对边角和底部进行单件运输测试。只有在原型通过测试后,我才会签字确认。
| 话题 | 我们 | 澳大利亚 | 我的规则 |
|---|---|---|---|
| 条形码 | UPC-A | EAN-13(GS1)7 | 保留这两个占位符 |
| 托盘底座 | 48×40″ | 1165×1165 毫米 | 文件中的地图 |
| 单位 | 英寸常用 | 毫米常用 | 始终显示两者 |
| 流血 | 3–5 毫米 | 3–5 毫米 | 将波纹8 |
| 安全 | 5–8 毫米 | 5–8 毫米 | 锁具附近 10 毫米 |
| 笛形/纹理 | 注意负载 | 注意负载 | 立柱用竖槽 |
| 标签 | 零售商特定 | 零售商特定 | 保持合规小组的自由运作 |
什么是模线结构?
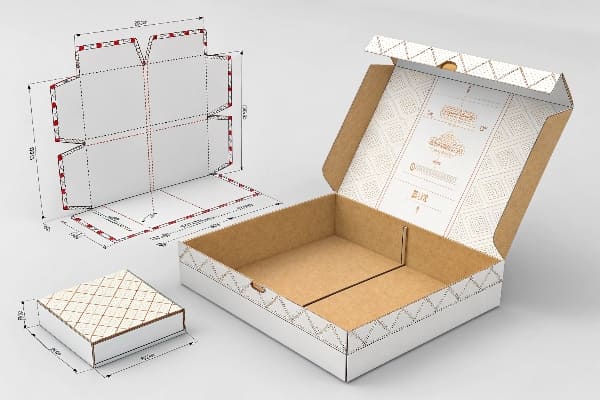
模切线不仅仅是一个形状,它还是一系列图层。这些图层告诉刀具、压痕机、印刷机和包装机该做什么。.
模切线结构是一个分层文件,它将切割、压痕、穿孔、粘合、印刷和注释分开,以便设计、模具和生产部门能够阅读同一份计划而无需猜测。.
永远不会让我失望的层
我严格遵循颜色和线条类型规范。切割线使用实心洋红色,并在打样时进行叠印。折痕线使用青色虚线。打孔线使用点划线。胶合区域使用柔和色调填充。仅用于印刷的图形位于单独的图层上,绝不与模具图层冲突。我添加了一个装配图层,其中包含箭头和数字,供商店员工使用。我添加了一个合规图层(图层9) ,其中包含用于澳大利亚 ARL 或其他回收标志以及美国零售备注的空白面板。我保留了一个托盘图层(图层10) ,其中包含两个市场的轮廓。我锁定了一个使用双单位的测量图层。我添加了一个备注图层,用于记录纸板等级和表面处理,例如 E 型瓦楞纸板、单层瓦楞纸板和哑光水性清漆。这种结构加快了交接速度。印前人员可以在不移动切割路径的情况下捕获图形。模具人员可以导出 DXF 文件供模具制造商使用。生产人员可以一目了然地查看胶合位置。
| 层 | 线条/填充 | 目的 | 笔记 |
|---|---|---|---|
| 切 | 坚硬的 | 刀径11 | 请勿重叠打印 |
| 褶皱 | 虚线 | 得分路径 | 增加分数宽限 |
| 性能 | 点划线 | 撕裂路径 | 控制撕裂强度 |
| 胶水 | 着色填充 | 粘合区12 | 添加重叠尺寸 |
| 打印 | CMYK/RGB | 图形 | 远离刀具 |
| 集会 | 箭头/数字 | 构建步骤 | 援助商店团队 |
| 遵守 | 空盒子 | 标签 | 满足澳大利亚/美国的需求 |
| 托盘图 | 大纲 | 堆叠 | 美国和澳大利亚的足迹 |
| 方面 | 双单元 | 检查 | 无比例误差 |
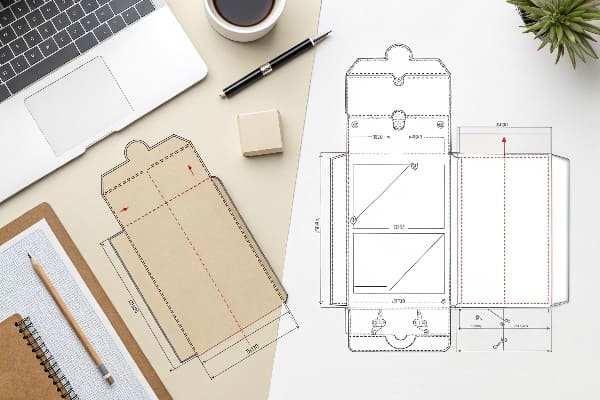
模板和模切线有什么区别?
人们常常混淆这些词,这会导致代价高昂的错误。我在文件里和与买家交谈时都会将它们分开。.
模板是用于确定尺寸和品牌的初始布局;模切线是最终的、可直接用于切割、压痕和粘合的分层路径图。模板指导;模切线用于生产。.
我如何向团队和买家解释这一点
我会使用模板13。模板展示了外形尺寸、大致面板布局以及主图的放置位置。我用它来收集反馈并加快设计审批流程。模板灵活快捷。我从不将模板发送给模具制造商。模切线14则不同。模切线精确且已锁定。它包含切割层、压痕层、穿孔层和胶层。它还包括条形码区域、托盘图和备注。它已准备好用于模具制作。只有在品牌方批准了 3D 渲染图和样品后,我才会从模板过渡到模切线。我曾在一个户外产品线的重型落地展示架上吃过亏。我匆忙地将模板送去模具制作。由于没有预留额外的压痕余量,底座在运输过程中撕裂了。我重新制作了一个真正的模切线,增加了更大的底座并改变了瓦楞方向,最终展示架通过了跌落测试。从那以后,我会在电子邮件、文件名和报价中明确标明名称。
| 物品 | 模板 | 模切线 |
|---|---|---|
| 目的 | 概念与契合度 | 制造和模具15 |
| 层 | 极简主义 | 全切/折痕/穿孔/胶水/注释 |
| 准确性 | 近似 | 精确到公差范围内 |
| 文件名 | *_template.ai | *_dieline.ai(或 .dxf,用于表示骰子) |
| 观众 | 品牌/营销 | 印前/模具/生产16 |
| 变化率 | 高的 | 低(受控) |
结论
一条主模切线,两个市场。我的设计采用双单元、条形码选项、托盘图和严格的图层结构。我会尽早制作原型。我注重时间、成本和信任。.
探索此资源将有助于您优化物流并提高供应链效率。. ↩
了解这些测试有助于确保您的产品能够经受运输考验,从而提高耐用性和客户满意度。. ↩
了解产品的尺寸和重量对于确保包装完整性和防止运输过程中损坏至关重要。. ↩
原型制作和测试有助于及早发现潜在问题,从长远来看可以节省时间和资源。. ↩
了解未印刷条形码区域的重要性可以提升您的包装设计,确保更好的扫描效果和合规性。. ↩
了解回收标志的作用可以帮助您与市场政策保持一致,并在包装中促进可持续性。. ↩
点击此链接,了解 EAN-13 条形码在零售和物流中的重要性和应用。. ↩
了解瓦楞纸材料如何增强包装的耐用性和可持续性,使其成为各种应用的理想选择。. ↩
了解合规层对于确保您的设计符合行业标准和法规至关重要。. ↩
探索托盘堆垛层数可以提高包装效率并优化运输流程。. ↩
了解刀具路径对于设计中的精确切割至关重要,可确保您的项目完美执行。. ↩
探索粘合区域有助于优化包装效率,并确保设计中的牢固粘合。. ↩
探索模板的使用可以增强您的设计工作流程,使其更加高效。. ↩
了解模切线对于确保准确有效的包装设计至关重要,因此该资源非常宝贵。. ↩
点击此链接,深入了解制造和模具方面的有效策略和技术。. ↩
本资源将帮助您了解印前和模具制造在确保高质量生产中的关键作用。. ↩


