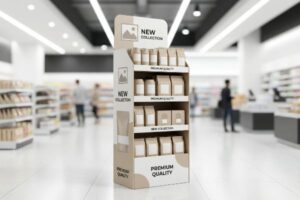
Are your retail displays fading into the background? Relying purely on standard ink often leads to flat, uninspiring merchandising that fails to capture shopper attention during brief promotional windows.
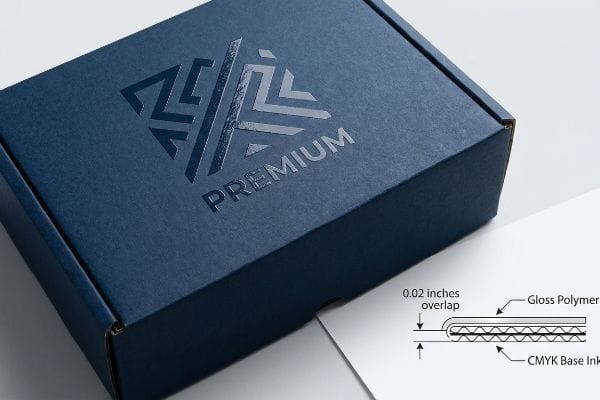
Using spot Ultraviolet (UV) printing creates immediate visual disruption by applying a high-gloss polymer coating to targeted design elements. This technique generates high-contrast reflections against matte substrates, drawing consumer eyes directly to premium branding without altering the primary structural integrity of your overall corrugated packaging framework.
To truly leverage this optical tool on the factory floor, we must first understand how it interacts with the physical physics of retail environments.
What is the difference between UV and spot UV?
Many brands request full-coverage gloss to make displays pop, completely ignoring the mechanical consequences of applying slick coatings across load-bearing structural bases.
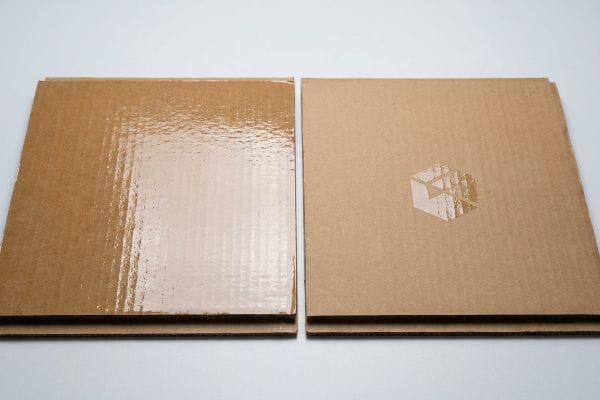
The difference between UV and spot UV lies in coverage volume. Full UV coats the entire board, creating a uniform slick surface. Spot UV isolates specific graphics with targeted gloss, leaving the remaining surface untreated or matte to maintain necessary mechanical friction during logistics handling.
This distinction goes far beyond visual preferences; it directly dictates how safely your flat-packed merchandise travels across global supply chains.
The Engineering Mechanics behind Surface Friction
Think of corrugated board coatings as the tread on a tire. When a full sheet of Edge Crush Test (ECT) 32 virgin kraft testliner is flooded with a continuous layer of liquid gloss varnish, you effectively remove all natural paper resistance1. This creates a frictionless plane where heavy master cartons easily slide off pallets during sharp forklift turns, shifting the dynamic weight distribution and causing bottom-tier collapse2.
I teach new structural engineers to use targeted coatings as a deliberate friction management tool. By isolating the polymer application exclusively to logos or key product images, we preserve the inherent grip of the surrounding raw paper or matte lamination. This hybrid approach ensures the physical footprint of the display maintains its calculated static friction coefficient3, allowing for safe double-stacking in standard 40-foot High Cube (40HQ) shipping containers4 without compromising the visual aesthetic.
| Metric/Feature | Full Coverage UV | Spot Application Reality |
|---|---|---|
| Static Friction | Dangerously low and slippery5 | Optimized grip on matte zones |
| Pallet Stability | Requires intense shrink-wrapping6 | Naturally resists lateral sliding |
| Material Cost | Higher liquid polymer usage7 | Reduced material consumption |
I always mandate isolated gloss zones for any load-bearing base panel. Balancing optical branding with physical grip ensures your units arrive safely while actively cutting down unnecessary liquid polymer consumption across high-volume retail rollouts.
🛠️ Harvey's Desk: Are your heavy checkout trays sliding off pallets and crushing your shipping ROI before they even reach the store? 👉 Get a Free Freight Density Audit ↗ — I review every structural file personally within 24 hours.
What is the use of spot UV?
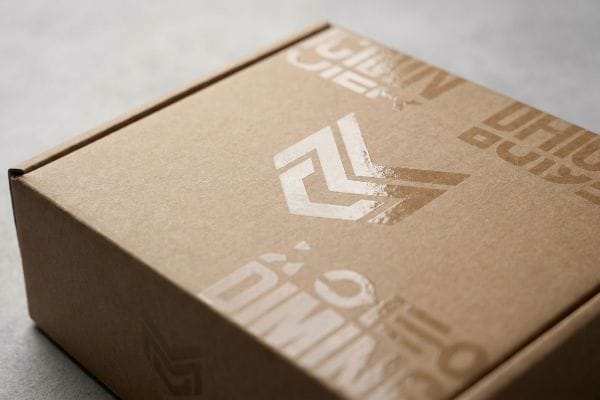
Applying targeted gloss is a calculated optical strategy to command visual hierarchy in crowded aisles, forcing the human eye to engage with specific focal points.
The use of spot UV printing focuses consumer attention by creating high-contrast texture against matte backgrounds. Engineers utilize this localized gloss to highlight logos, typography, or critical product features, providing a premium tactile experience that elevates perceived brand value without flooding the entire substrate.
However, translating this digital design strategy into a physical reality requires tight mechanical control over factory printing presses.
The Engineering Mechanics behind Contrast Architecture
Treating light reflection as a structural component allows us to control the visual strike zone at the standard 50-54 inch (127-137 cm) human eye level8. By combining a light-absorbing matte base with a highly reflective polymer, we create an optical depth-of-field effect9. The gloss layer catches ambient fluorescent store lighting, making the targeted artwork physically pop forward without requiring additional structural layers.
To execute this flawlessly on the production floor, I apply a specific high-viscosity screen printing methodology. The liquid polymer must be mathematically trapped with a precise 0.02 inches (0.5 mm) overlap10 over the underlying Cyan, Magenta, Yellow, Black (CMYK) offset ink. This mechanical tolerance accounts for the natural microscopic shifting of corrugated sheets as they pass through high-speed presses, ensuring the hardened clear coat perfectly aligns with the artwork beneath it without leaving an ugly misregistered halo.
| Print Metric | Generic Approach | Engineered Reality |
|---|---|---|
| Alignment Tolerance | Zero margin for error | 0.02 inches (0.5 mm) overlap11 |
| Visual Depth | Flat surface reflection | High-contrast multi-layer depth |
| Polymer Viscosity | Thin, prone to bleeding | High-viscosity for sharp edges12 |
I utilize precise trapping algorithms in prepress to guarantee sharp alignment. Treating clear coatings with the exact same mechanical rigor as structural dielines ensures high-fidelity execution across every single production batch.
🛠️ Harvey's Desk: Is your current counter display design losing its visual punch because the gloss alignment naturally drifts during high-speed automated printing runs? 👉 Discuss Your Prepress Strategy ↗ — 100% confidential. Your unreleased retail designs are safe with me.
What is the difference between spot UV and raised UV?
Elevating flat graphics into a tangible physical texture introduces complex tension dynamics that must be carefully managed around creases and folds.
The difference between spot UV and raised UV involves polymer thickness. Standard spot UV lays flat against the paperboard, providing a smooth reflective shine. Raised UV layers heavy polymer liquids to create a measurable, physical 3D bump, offering a textured tactile sensation when customers interact with displays.
While the visual outcome is striking, this added dimensional thickness fundamentally changes how the paper behaves under the intense pressure of die-cutting machinery.
The Engineering Mechanics behind Polymer Build-Up
Applying standard thin coatings merely changes the optical property of the substrate. However, raised applications introduce a hardened, structural layer of plastic atop the flexible cellulose fibers. This rigid build-up acts similarly to a microscopic weld, drastically altering how the base material bends when subjected to kinetic force.
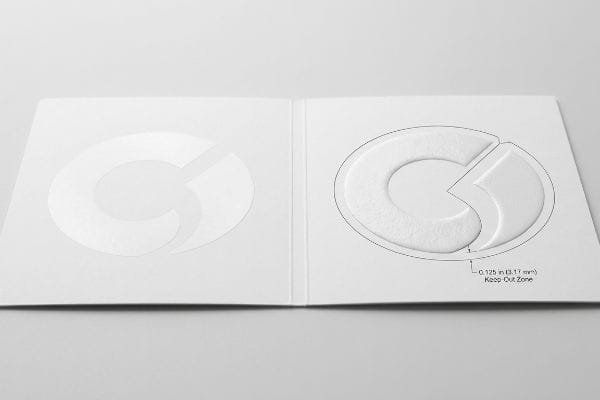
When I engineer high-end cosmetic counter units utilizing thick 3D polymers, I strictly enforce a calculated keep-out zone around all mechanical score lines. If thick liquid plastics cure directly over a planned 90-degree crease, the hardened material will violently resist the steel rule die13 during assembly. By pulling the gloss mask back precisely 0.125 inches14 (3.17 mm) from all folding joints, we allow the raw corrugated board to bend naturally, avoiding rigid surface fracturing while maintaining the premium embossed feel on the main panels.
| Structural Feature | Flat Application | Raised Application Reality |
|---|---|---|
| Coating Profile | Micro-thin layer | Measurable 3D polymer dome15 |
| Folding Flexibility | Moves with paper fibers | Rigid, resists 90-degree bends16 |
| Hinge Tolerance | Can cross score lines | Requires 0.125 inches (3.17 mm) buffer17 |
I isolate thick tactile coatings exclusively to flat viewing planes. Respecting the physical limits of paperboard tension ensures your displays fold cleanly without cracking, preserving both aesthetics and mechanical assembly speed.
🛠️ Harvey's Desk: Are rigid specialty coatings causing your display headers to crack during assembly and slowing down the co-packing line? 👉 Request a Structural Dieline Audit ↗ — No account managers in the middle. You talk directly to structural engineers.
What is the difference between spot UV and blind UV?
Creating visual shapes using nothing but light reflection is a sophisticated technique that requires a deeply unreflective base material to function effectively.
The difference between spot UV and blind UV depends on underlying ink. Spot UV explicitly traces printed graphics to enhance existing colors. Blind UV applies the gloss pattern directly over solid or unprinted areas, creating subtle watermark effects purely through contrasting light reflection rather than relying on colored ink.

Because this technique relies heavily on the negative space around the pattern, the integrity of the unprinted background becomes a major logistical vulnerability.
The Engineering Mechanics behind Substrate Reflection
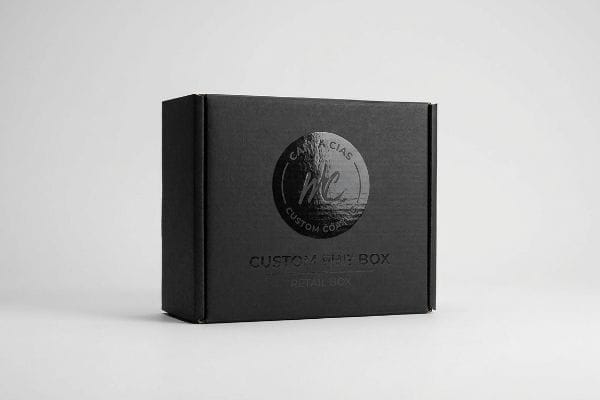
Blind application acts as an invisible structural watermark. Instead of reinforcing a printed logo, it uses a clear liquid polymer to build its own independent geometric shape on top of a dark, uniform background. To maximize the optical bounce and make the invisible shape readable, the foundational layer must absorb as much ambient light as possible18.
In my factory operations, I pair this technique strictly with an anti-scuff matte polypropylene film lamination19. If you apply clear geometric patterns over standard, unprotected black ink, the harsh vibrations of ocean transit will rub the exposed matte zones into a chalky mess20. By combining a hyper-resilient scratch-resistant matte film with a transparent blind gloss, I engineer a high-end sensory contrast that survives a container journey, arriving at the club store with pristine branding completely intact.
| Finish Metric | Spot Alignment | Blind Application Reality |
|---|---|---|
| Substrate Focus | Anchored to CMYK ink21 | Acts as independent graphic22 |
| Base Requirement | Standard matte or raw | Demands anti-scuff film lamination23 |
| Transit Durability | Protected by pattern | Vulnerable without resilient base |
I mandate highly durable scratch-resistant films whenever designing with invisible gloss patterns. Protecting the negative space from transport abrasion is mathematically just as important as highlighting the reflective brand elements.
🛠️ Harvey's Desk: Is your dark luxury packaging suffering from transit scuffing that ruins the subtle impact of your invisible gloss patterns? 👉 Get a Surface Finish Review ↗ — I review every structural file personally within 24 hours.
Conclusion
Mastering optical coatings goes far beyond aesthetics; it requires mathematically managing the physical friction of slipping master cartons and actively preventing 3D polymers from violently cracking your 90-degree score lines. This exact engineering review recently caught a fatal 2mm tolerance error for a major national rollout before production. If you suspect your print finishes are actively compromising your structural integrity, let me personally run your structural files through a Free Surface Tolerance Audit ↗ to safeguard your next campaign.
"[PDF] Optimization in the Application of Varnishes Barrier on Cartonboard …", https://repository.rit.edu/cgi/viewcontent.cgi?article=1187&context=japr. [An authoritative source on packaging materials would quantify the reduction in the coefficient of friction (CoF) when applying gloss coatings to kraft liners]. Evidence role: technical specification; source type: material science journal or packaging standard. Supports: effect of varnish on friction. Scope note: specifically for virgin kraft liners. ↩
"The Importance of Pallet Stability in the Beverage Industry | Lindum", https://www.lindumpackaging.com/resources/pallet-stability-and-the-beverage-industry/. [Logistics and structural engineering studies demonstrate how lateral shifting of loads on pallets increases pressure on specific points, leading to structural failure of lower boxes]. Evidence role: causal mechanism; source type: supply chain engineering manual. Supports: link between low friction and box collapse. Scope note: applies to stacked master cartons. ↩
"UV-curable coating process on CMYK-printed duplex paperboard …", https://bioresources.cnr.ncsu.edu/resources/uv-curable-coating-process-on-cmyk-printed-duplex-paperboard-part-1-mechanical-and-optical-properties/. [Materials science literature or engineering handbooks would provide the quantitative difference in friction coefficients between gloss-coated and uncoated paper surfaces]. Evidence role: technical verification; source type: engineering manual. Supports: claim that selective coating preserves surface grip. Scope note: values vary by substrate material. ↩
"Stacking Shipping Containers: Weight Limits, Max Height, and Field …", https://www.mobilemodularcontainers.com/blog/stacking-shipping-containers. [Logistics safety standards or cargo securing guidelines would specify the minimum friction requirements to prevent load slippage during double-stacking in high-cube containers]. Evidence role: safety standard verification; source type: regulatory guideline. Supports: connection between surface friction and logistical safety. Scope note: applies to standard shipping dynamics. ↩
"Blogs, News Solution | The key to the smoothness of UV skin coating", https://en.tech-polymer.com/?p=2196. [Material science data on surface coatings would quantify the reduction in the coefficient of static friction caused by full-surface UV gloss application]. Evidence role: Technical verification; source type: Material Science Handbook. Supports: The claim that full coverage UV reduces grip. Scope note: Specifically refers to static friction on load-bearing bases. ↩
"[PDF] Unitizing Goods on Pallets and Slipsheets", https://research.fs.usda.gov/download/treesearch/5822.pdf. [Industrial logistics and load-securing standards would document the increased risk of lateral sliding for low-friction coated materials during palletized transport]. Evidence role: Practical application; source type: Logistics Engineering Guide. Supports: The necessity of increased containment for stability. Scope note: Applies to warehouse and transport environments. ↩
"What is Spot UV Coating? Types, Process & Benefits Explained", https://www.customboxmakers.com/what-is-spot-uv/?srsltid=AfmBOoq49UGFIsCWbCtGLEUS2YBjnFYVq2zP84iDf8_cff0HvYbipVxb. [Manufacturing specifications for UV curing processes would provide the comparative volume of liquid polymer required for total surface coverage versus selective spot application]. Evidence role: Quantitative comparison; source type: Manufacturing Technical Specification. Supports: The claim regarding increased material costs. Scope note: Relative to total surface area of the display. ↩
"What Is the Average Eye Level Height? – PopDisplay", https://popdisplay.me/what-is-the-average-eye-level-height/. [Ergonomic data and retail design standards confirm the average human eye level range to justify the placement of visual strike zones]. Evidence role: factual verification; source type: ergonomic study or design manual. Supports: visual placement height. Scope note: Figures may vary based on global population averages. ↩
"Lightness perception for matte and glossy complex shapes – PubMed", https://pubmed.ncbi.nlm.nih.gov/28025053/. [Principles of optical physics explain how differing levels of specular reflection create a perceived three-dimensional depth between surface layers]. Evidence role: technical explanation; source type: optical physics textbook or printing engineering guide. Supports: the visual 'pop'of spot UV. Scope note: Effect is highly dependent on ambient lighting conditions. ↩
"the limits of Spot UV – PrintPlanet.com", https://printplanet.com/threads/the-limits-of-spot-uv.284838/. [A printing engineering manual or technical standard for screen printing would verify the specific overlap measurements required for trapping spot UV on CMYK prints to prevent misregistration]. Evidence role: Technical specification; source type: Printing industry manual. Supports: The required mechanical tolerance for spot UV alignment. Scope note: Tolerance may vary slightly based on press speed and substrate stability. ↩
"What kinds of gaps/tolerances should I use when designing pieces …", https://3dprinting.stackexchange.com/questions/6576/what-kinds-of-gaps-tolerances-should-i-use-when-designing-pieces-that-fit-togeth. [A technical manual or industry standard for precision printing would verify the specific alignment tolerances and acceptable overlap metrics for high-end spot UV applications]. Evidence role: Technical specification; source type: Industry standard. Supports: Precision engineering requirements. Scope note: Values may vary slightly by machine manufacturer. ↩
"How Can You Troubleshoot Ink Bleeding Issues on a UV Flatbed …", https://www.andresjet.com/blogs/knowledge/how-can-you-troubleshoot-ink-bleeding-issues-on-a-uv-flatbed-printer. [Material safety data sheets or chemical engineering texts on UV-curable polymers would explain how higher viscosity prevents ink bleeding and maintains edge definition]. Evidence role: Material property verification; source type: Technical datasheet. Supports: Polymer selection for high-contrast printing. Scope note: Relates specifically to the fluid dynamics of UV coatings. ↩
"The Main Failure Modes of Hot-Work Die Steel and the … – PMC", https://pmc.ncbi.nlm.nih.gov/articles/PMC11277942/. [Materials science research on UV-cured polymers details the brittle fracture mechanics that occur when rigid coatings are forced to bend over a crease]. Evidence role: physical principle; source type: materials science journal. Supports: the mechanical reason for avoid coating over score lines. Scope note: Focuses on the interaction between rigid polymers and substrate deformation. ↩
"[PDF] Development of Fiber Composite Joints to Improve Folding of …", https://scholarsarchive.byu.edu/cgi/viewcontent.cgi?article=11915&context=etd. [Packaging engineering standards specify minimum clearance distances for high-build coatings from score lines to prevent cracking during assembly]. Evidence role: technical specification; source type: industry manufacturing guideline. Supports: the specific measurement for the keep-out zone. Scope note: Exact distance may vary based on the specific polymer viscosity and board thickness. ↩
"Your Guide to Spot UV: Maximizing Print Embellishment Opportunities", https://www.duplointernational.com/article/your-guide-to-uv-coating. Cross-sectional analysis of high-build UV varnishes confirms the formation of a convex physical structure rather than a uniform thin film. Evidence role: physical characteristic verification; source type: technical manual. Supports: the structural difference between spot and raised UV. Scope note: Dome height is determined by the number of coating passes. ↩
"Why Cylinder UV Prints Crack on Silicone and Flexible Materials", https://www.mtutech.com/Blogfor360RotaryUVPrinter/Why-Cylinder-UV-Prints-Crack-on-Silicone-and-Flexible-Materials-2542.html. Material science data on UV-curable resins indicates that increased thickness leads to higher modulus of elasticity and brittleness, causing failure during sharp folds. Evidence role: material property verification; source type: technical data sheet. Supports: the reduction in folding flexibility compared to flat UV. Scope note: Results depend on the specific polymer formulation and curing intensity. ↩
"Raised UV Printing FAQ | Support – Smartpress", https://smartpress.com/support/product-faq/raised-uv-printing-faq?srsltid=AfmBOoqPehvQG8j5qqY7yiscTsOTI71x-sCXZARdYWHyUIIhkLaMbGiw. Technical printing specifications for raised UV coatings define the minimum safety margin required from fold lines to prevent coating fracture. Evidence role: technical specification; source type: industry printing standard. Supports: hinge tolerance requirements for raised polymers. Scope note: Buffer distances may vary based on substrate thickness and resin viscosity. ↩
"Best Substrates for UV Printing: A Comprehensive Material Guide", https://www.mtutech.com/BlogforUVPrinter/Best-Substrates-for-UV-Printing-A-Comprehensive-Material-Guide-1018.html. [An authoritative source on printing optics would explain how the contrast between the specular reflection of the UV polymer and the diffuse absorption of a dark matte substrate enhances visibility]. Evidence role: technical verification; source type: printing engineering manual. Supports: the necessity of a non-reflective base for blind UV. Scope note: Applies specifically to blind UV on dark substrates. ↩
"Anti-scratch lamination, better scratch and scuff resistance – cefBox", https://www.cefbox.com/library/anti-scratch-lamination. [Technical documentation on printing materials would detail the chemical composition of anti-scuff polypropylene and its ability to resist surface abrasion.] Evidence role: Technical specification; source type: Manufacturing data sheet. Supports: Material choice for durability. Scope note: Limited to polypropylene-based films. ↩
"I swatched ALL the shades ng Maybelline Super Stay …", https://www.youtube.com/shorts/uMwppz2x7Sc. [Packaging engineering research explains how friction and vibrations during shipping lead to burnishing, where matte surfaces degrade or change texture due to surface abrasion.] Evidence role: Causal mechanism; source type: Logistics and packaging study. Supports: Rationale for lamination. Scope note: Specific to non-protected matte finishes. ↩
"Spot UV Printing Explained: Techniques, Applications, and Benefits", https://www.epackprinting.com/support/what-is-spot-uv/. [A technical printing guide would explain how spot UV is registered to align precisely with pre-printed CMYK ink layers]. Evidence role: Technical process verification; source type: Printing industry manual. Supports: Spot UV alignment mechanics. Scope note: Applies to standard commercial offset and digital printing. ↩
"What is UV Printing? Benefits and Uses – Printful", https://www.printful.com/blog/what-is-uv-printing. [Graphic arts textbooks define blind UV as a tactile finish applied without underlying ink, allowing it to function as a standalone visual element]. Evidence role: Definitional; source type: Academic textbook. Supports: The visual nature of blind UV. Scope note: Contrast with ink-dependent spot UV. ↩
"The Ultimate Guide to UV Coating: Benefits, Types & Uses", https://www.epackprinting.com/support/the-ultimate-guide-to-uv-coating-benefits-and-applications/. [Industry standards for blind UV application specify the use of anti-scuff laminates to ensure adhesion and prevent surface abrasion on uninked substrates]. Evidence role: Technical requirement; source type: Material specification sheet. Supports: Base substrate requirements for blind UV. Scope note: Specifically pertains to high-durability commercial finishes. ↩