When looking for the perfect cardboard display, customization is key. It’s not just about creating something functional, but also something that speaks directly to your brand and catches your customer’s eye.
Custom cardboard displays allow businesses to showcase products in an engaging way. Whether for a retail shop, trade show, or promotional event, they can be personalized to match your brand’s unique identity.
Custom cardboard displays are an excellent choice for businesses looking to make a strong visual impact while maintaining practicality. But how do you go about making these displays, and what considerations should you take into account for a truly effective custom display?
How do you make a cardboard display stand?
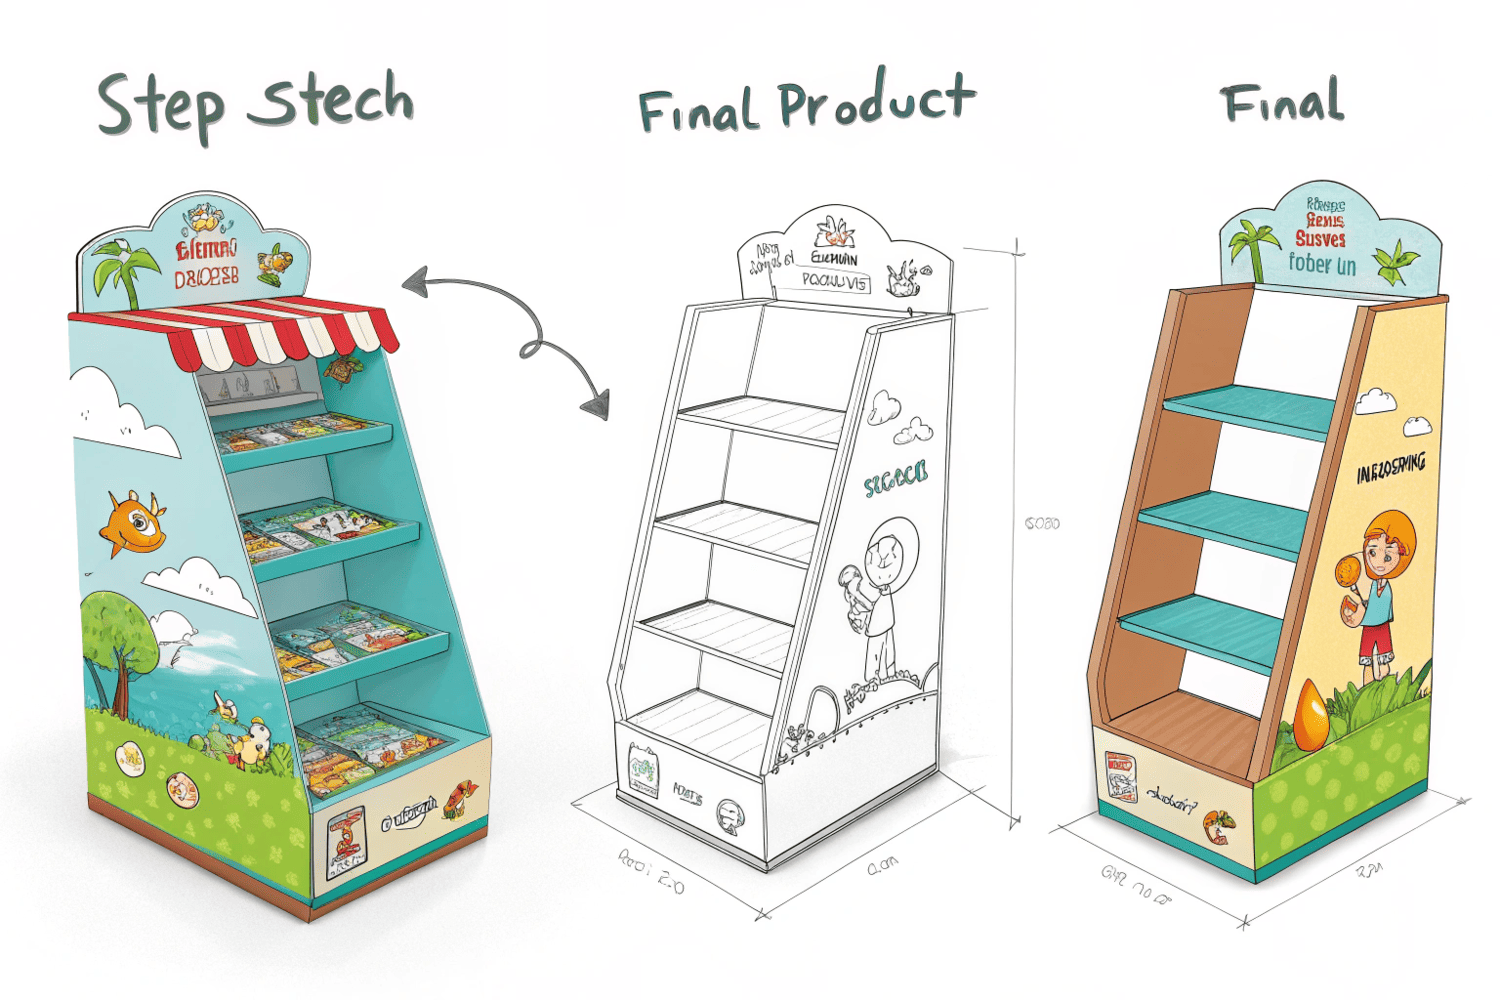
Creating a cardboard display stand is a straightforward yet creative process that combines design, material choice, and precision crafting. Whether you’re looking to build a stand for a one-time event or a long-term display solution, there are a few key steps to follow.
To make a cardboard display stand, you need a thoughtful design, sturdy material, and precise cutting. The stand should not only support the product but also enhance the overall display experience.

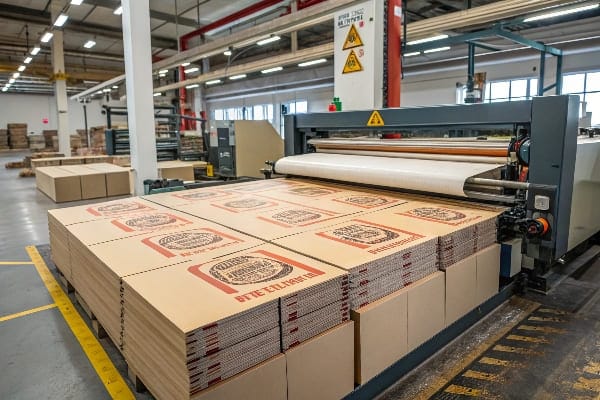
Designing a cardboard display stand1 starts with understanding the product’s dimensions, weight, and desired appearance. You’ll want to create a stand that not only supports the product safely but also offers visual appeal. This involves choosing the right type of cardboard, usually corrugated cardboard2 for durability, and ensuring the display is designed to meet weight and load requirements3.
The stand’s design can range from simple, flat-pack solutions to more intricate, multi-dimensional displays. Digital tools such as CAD software4 are helpful for visualizing your design before moving on to the prototyping stage. Once the design is approved, cardboard sheets are cut and folded using precise tools like a die cutter5 or laser cutter6. If necessary, additional features like shelves or compartments can be added to the stand to improve functionality.
Customization options7 include printing designs, logos, and branding elements directly onto the cardboard. This enhances the visual appeal and reinforces your brand identity8. Whether it’s vibrant graphics or simple branding, the printed elements9 will help draw attention to your product.
What are custom display boxes?
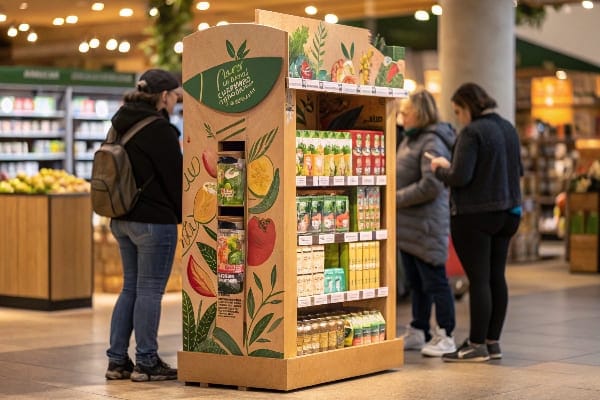
Custom display boxes are specifically designed boxes used to showcase products in an eye-catching and functional way. These boxes are tailor-made to fit the unique needs of your product, offering the right dimensions, structure, and visual appeal.
Custom display boxes are designed specifically to highlight your product while being functional, durable, and aesthetically pleasing. They help your product stand out in crowded retail spaces.
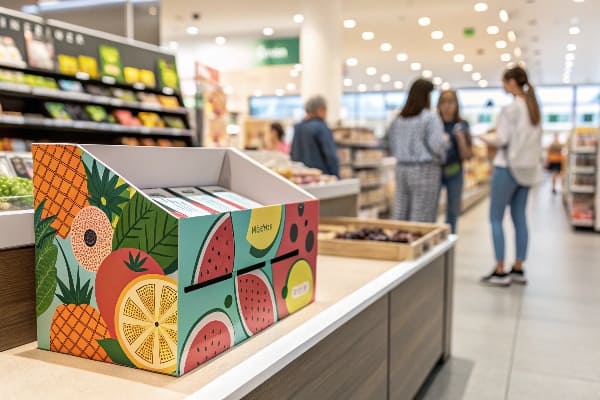
Custom display boxes come in various styles depending on the type of product they are designed for. Some common types include countertop displays10, floor displays11, and shelf displays. Each type of display box serves a different purpose, but all share the same goal: making the product stand out.
These boxes are made from corrugated cardboard, which is both sturdy and lightweight12. This material ensures that the product remains safe during transport while being easy to handle and assemble. Additionally, custom display boxes13 can be designed with compartments, trays, or other features to organize products and make them more accessible to customers.
One of the biggest benefits of custom display boxes is the ability to brand them with your company’s logo, colors, and other visual elements. This not only makes the box more attractive but also reinforces your branding, helping customers easily recognize your products.
Additionally, you can choose from various printing methods like offset printing14, digital printing15, or flexographic printing16, depending on the desired quality and quantity of the order. Printing quality plays a crucial role in how your product is perceived by consumers, so it’s essential to select a reliable printing method for a professional finish.
Can you print onto cardboard?
Yes, you can print directly onto cardboard, and it is one of the most popular ways to customize displays. Printing on cardboard allows you to add graphics, logos, and product information directly to the surface, enhancing the overall design and functionality of the display.
Printing onto cardboard is a great way to customize your displays. It adds visual interest, brand recognition, and essential product information all in one.
When printing onto cardboard, it’s essential to choose the right type of printing method. Common methods include digital printing, offset printing, and flexographic printing. Each method has its advantages and is selected based on the number of prints needed and the level of detail required.
Digital printing is often used for smaller runs or more complex designs since it allows for quicker production times and lower setup costs. Offset printing, on the other hand, is ideal for larger print runs and offers high-quality results, especially for more intricate designs. Flexographic printing is often used for packaging and larger orders, providing excellent print quality while being cost-effective for bulk production.
Before printing, you should also consider the material’s texture1 and the type of ink to be used. Cardboard has a rougher texture compared to other materials like paper, so the printing process2 must ensure that the colors pop without compromising quality. Additionally, you can choose between various finishes3 like matte or glossy, depending on your brand’s desired look.
What is the HS code for cardboard display?
The HS (Harmonized System) code for cardboard displays is crucial for international shipping and customs clearance. It helps categorize products for tariffs, taxes, and other regulatory requirements during export and import.
The HS code for cardboard displays typically falls under the category for paper and cardboard products. This code helps streamline the process of importing and exporting displays across borders.
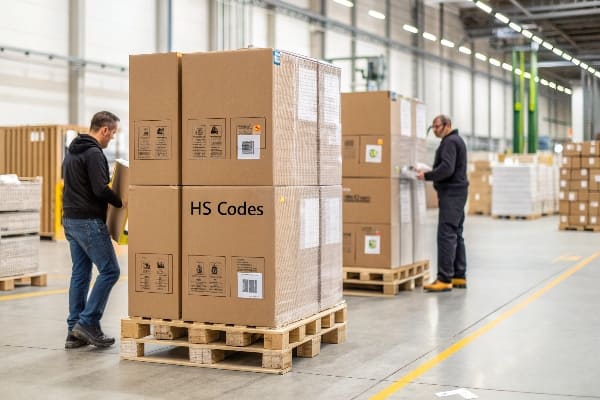
The specific HS code for cardboard displays17 may vary depending on the exact nature of the product. For general cardboard displays, the code usually falls under the broader category of "Other paperboard containers18" (HS Code 481919). This code encompasses various types of paperboard packaging, including corrugated boxes and displays.
If you’re exporting cardboard displays, it’s important to ensure that the correct HS code20 is used. The wrong code could lead to delays, extra charges, or problems with customs clearance21. Working with a freight forwarder22 or logistics expert can help you ensure that the correct code is used.
In some cases, additional documentation or certifications23 may be required depending on the destination country. For instance, certain regions may require certificates proving the materials used in the display are recyclable24 or meet environmental standards25.
Conclusion
Custom cardboard displays are a fantastic way to showcase products while promoting your brand. From design to printing to shipping, the entire process is customizable, allowing you to create displays that truly reflect your business’s values and products.
Explore this resource to learn effective strategies and tips for creating an eye-catching and functional cardboard display stand. ↩ ↩
Discover the advantages of using corrugated cardboard in display stands, including its durability and structural integrity. ↩ ↩
Understanding weight and load requirements is crucial for safety; this link will guide you through the necessary calculations and considerations. ↩ ↩
Explore this link to discover top CAD software that can enhance your design process and visualization capabilities. ↩
Learn about die cutters and their role in creating precise designs for displays, ensuring high-quality results. ↩
Find out how laser cutters can improve your display design process with precision and efficiency. ↩
Explore various customization options to enhance your cardboard packaging and brand identity effectively. ↩
Understanding brand identity in packaging can help you create a stronger connection with your customers. ↩
Learn how printed elements can significantly improve the visual appeal and marketability of your products. ↩
Learn about countertop displays and their effectiveness in retail settings to attract customer attention. ↩
Discover the advantages of floor displays in marketing strategies to boost product visibility. ↩
Discover why the combination of sturdiness and lightweight design is crucial for efficient packaging and transport. ↩
Learn how custom display boxes can enhance product presentation and customer experience through effective organization. ↩
Explore this link to understand the benefits and process of offset printing, a popular choice for high-quality prints. ↩
Learn about digital printing’s flexibility and efficiency, making it ideal for short runs and quick turnaround times. ↩
Discover the applications and benefits of flexographic printing, especially in packaging and labels, to enhance your printing knowledge. ↩
Exploring the uses of cardboard displays can provide insights into effective marketing and product presentation strategies. ↩
Learning about Other paperboard containers can enhance your knowledge of packaging options and compliance in trade. ↩
Understanding HS Code 4819 can help you navigate international shipping and customs regulations effectively. ↩
Understanding HS codes is crucial for smooth international trade. Explore this link to learn more about their significance. ↩
Customs clearance can be complex. This resource will help you navigate potential challenges and avoid delays in your shipments. ↩
Freight forwarders play a vital role in logistics. Discover how they can simplify your shipping process and ensure compliance. ↩
Learning about necessary certifications can streamline your shipping process and avoid potential legal issues. ↩
Understanding recyclable material requirements can help ensure compliance and sustainability in your shipping practices. ↩
Exploring environmental standards can guide you in meeting regulations and promoting eco-friendly practices in your business. ↩